Do you dream of crafting café-quality lattes and cappuccinos from the comfort of your own kitchen? Your electric milk steamer is the unsung hero of this daily ritual, transforming ordinary milk into velvety microfoam. However, without proper care, the mineral buildup from your water—commonly known as limescale—can quickly sabotage your steamer’s performance, affecting both the taste and texture of your frothed milk. Neglecting this vital maintenance step can lead to inconsistent froth, slower heating, and even a shorter lifespan for your beloved appliance.
This comprehensive guide will demystify the process of descaling your electric milk steamer, providing you with simple, step-by-step instructions and essential tips. By making descaling a regular part of your cleaning routine, you’ll ensure your steamer continues to deliver delicious, perfectly frothed milk consistently, enhancing every sip of your favorite beverages. Get ready to restore your milk steamer to its optimal glory and elevate your home barista experience.
What is Descaling and Why is it Essential for Your Electric Milk Steamer?
Descaling is the critical process of removing mineral deposits, primarily calcium and magnesium, that naturally accumulate inside appliances that heat water. This chalky buildup, often called limescale, comes from the dissolved minerals present in tap water. Over time, as water is heated and evaporates, these minerals are left behind, forming a hard layer on heating elements, sensors, and internal tubing.
For your electric milk steamer, descaling is not merely a suggestion—it’s a necessity. Limescale acts like an insulator, coating the heating elements and forcing your steamer to work harder and longer to achieve the desired temperature. This not only reduces its energy efficiency but also significantly impairs its ability to create consistent, high-quality froth. Clogged internal mechanisms can lead to sputtering, uneven heating, and eventually, appliance malfunction. Regular descaling prevents these issues, ensuring your steamer heats milk efficiently, produces that coveted velvety microfoam, and maintains optimal performance, ultimately extending its lifespan and preserving the delicious taste of your frothed creations.
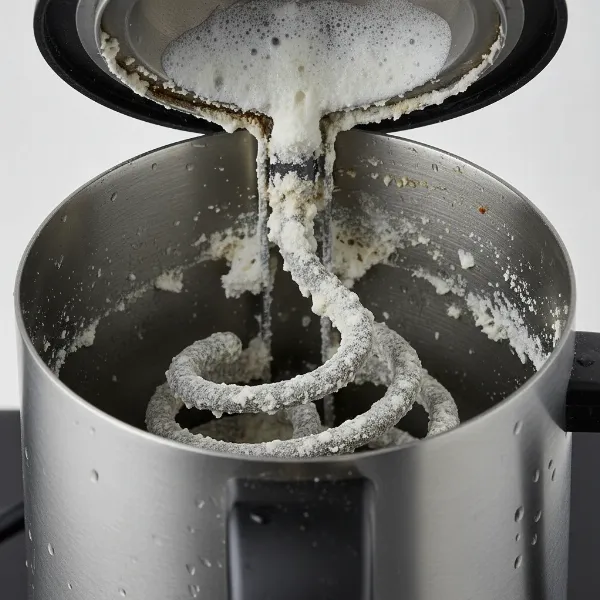 Limescale buildup inside an electric milk steamer's heating element, indicating poor performance.
Signs Your Electric Milk Steamer Needs Descaling
Recognizing when your electric milk steamer needs a descaling treatment is crucial for maintaining its performance and longevity. Ignoring these warning signs can lead to frustration and a subpar frothing experience. Fortunately, your steamer often provides clear indicators that it’s time for a deep clean.
One of the most common signs is a noticeable reduction in performance. You might find that your steamer takes significantly longer to heat milk or struggles to produce the thick, consistent froth you’ve come to expect. The resulting milk foam might be thin, watery, or have large, uneven bubbles. Another tell-tale sign is the appearance of visible mineral deposits—white, chalky residue—on the heating plate, frothing whisk, or internal surfaces. These deposits are a direct result of limescale buildup. Furthermore, you might begin to hear unusual noises, such as excessive gurgling, hissing, or straining sounds during operation, indicating that internal pathways are restricted. If your frothed milk begins to taste slightly off or metallic, this can also be a sign that limescale is impacting the flavor. Finally, if your steamer isn’t heating the milk to the usual temperature or producing the expected volume of frothed milk, descaling is likely overdue.
Common Descaling Methods for Electric Milk Steamers
When it comes to tackling limescale in your electric milk steamer, you have several effective options, ranging from common household ingredients to specialized commercial products. Each method has its own advantages and considerations, allowing you to choose the best approach for your specific needs and preferences.
| Descaling Agent | Pros | Cons | Dilution/Usage |
|---|---|---|---|
| White Vinegar | Natural, inexpensive, readily available | Strong odor, requires thorough rinsing | 1:1 ratio with water |
| Citric Acid | Natural, odorless, very effective | May need to be purchased, less common | 1-2 tablespoons per liter of water |
| Commercial Descaler | Formulated for appliances, highly effective | More expensive, may contain chemicals, brand-specific | Follow manufacturer’s instructions precisely |
White vinegar is a popular choice due to its natural acidity, which effectively dissolves limescale. It’s a cost-effective and environmentally friendly option found in most kitchens. However, its distinct odor requires careful rinsing to ensure no residual smell affects your milk. Citric acid, a natural compound found in citrus fruits, is another excellent and odorless alternative. It’s highly effective at breaking down mineral deposits and is food-safe. You can typically find it in powder form in grocery stores or online. Lastly, commercial descaling solutions are specifically formulated for coffee machines and milk steamers. These products are often very potent and designed for maximum effectiveness, but it’s crucial to follow their instructions carefully and ensure they are compatible with your specific steamer model. Always prioritize safety and thorough rinsing, regardless of the method chosen, to avoid any impact on your frothed milk.
Step-by-Step Guide: How to Descale Your Electric Milk Steamer
Descaling your electric milk steamer is a straightforward process that can significantly improve its performance and extend its life. While it’s always wise to consult your appliance’s user manual for specific instructions, the general steps for descaling are universal. We’ll outline a comprehensive method using white vinegar, a widely available and effective descaling agent.
Preparation is Key: Before you begin, always ensure your electric milk steamer is unplugged from the power outlet. Empty any residual milk and give the interior a quick rinse with warm water to remove any immediate milk residue. If your steamer has detachable parts, like a whisk or lid, remove and clean them separately with warm, soapy water. Check your manufacturer’s manual for any specific descaling warnings or recommendations, particularly regarding suitable descaling agents.
- Create the Descaling Solution: For an effective and safe solution, mix equal parts white vinegar and fresh water. For example, if your steamer has a capacity of 2 cups, combine 1 cup of white vinegar with 1 cup of water in a separate container. Adjust the proportions based on your steamer’s size, ensuring you have enough solution to fill it to the recommended maximum fill line without overflowing.
- Fill the Steamer: Carefully pour the vinegar and water solution into the milk steamer. Make sure the solution covers the heating element and reaches the MAX fill line as indicated by your appliance. Do not overfill.
- Run a Descaling Cycle: Plug in your electric milk steamer. Turn it on and allow it to complete a full heating and frothing cycle, just as you would with milk. Crucially, do not add any milk during this step. If you are descaling a steam wand on an espresso machine, immerse the wand into a pitcher filled with the descaling solution and activate the steam for 30-60 seconds, then turn it off.
- Allow to Soak (Optional, for Stubborn Buildup): If you notice particularly stubborn mineral deposits, or if your steamer hasn’t been descaled in a while, let the solution sit in the steamer for an additional 15-20 minutes after the cycle is complete. For steam wands, let the wand soak in the solution for the same duration. This extended contact time allows the acidic solution to further break down the limescale.
- Empty and Rinse Thoroughly: Carefully pour out the descaling solution. It’s vital to rinse the interior of your steamer thoroughly with fresh, clean water multiple times. This step helps to remove all traces of the vinegar solution and any dislodged mineral particles. For steam wands, wipe the wand clean and purge it with steam for a few seconds.
- Perform Rinse Cycles: To ensure no residual descaling solution or odor remains, fill the steamer with fresh water and run 1-2 full heating/frothing cycles (again, without milk). This flushes out any lingering acidic taste or smell. After each cycle, empty the water and refill with fresh water. For steam wands, run several full purges with fresh water.
- Final Wipe Down: Once the rinse cycles are complete, unplug the steamer and use a clean, damp cloth to wipe down both the interior and exterior of the appliance. Reassemble any detached parts. Your electric milk steamer is now descaled, clean, and ready to make delicious, perfectly frothed milk.
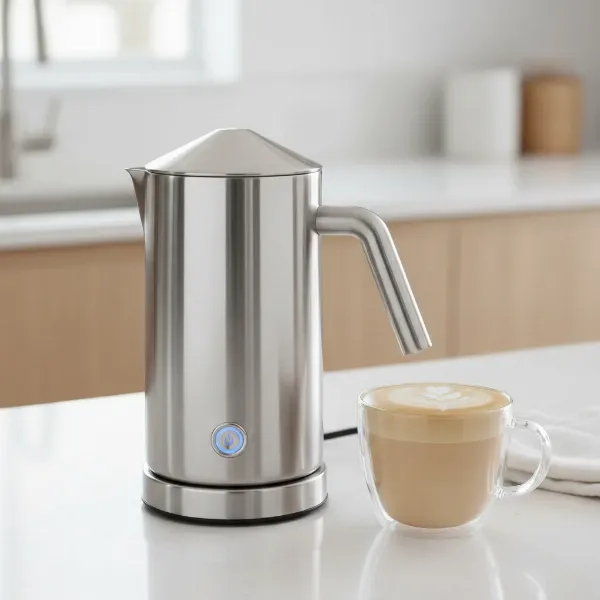 A sparkling clean electric milk steamer ready to produce perfect, velvety microfoam for coffee beverages.
How Often Should You Descale Your Electric Milk Steamer?
The frequency with which you should descale your electric milk steamer is a common question, and the answer isn’t a one-size-fits-all. While a general recommendation exists, several factors play a significant role in determining the ideal descaling schedule for your specific usage. Understanding these elements will help you keep your steamer in pristine condition.
As a general guideline, most experts suggest descaling your electric milk steamer every 1 to 3 months for regular home use. This interval helps prevent the significant accumulation of limescale that can impact performance. However, this frequency can vary based on two primary factors:
- Water Hardness: This is arguably the most crucial factor. If you live in an area with hard water (water rich in dissolved minerals like calcium and magnesium), you will need to descale your steamer more frequently—perhaps monthly. Hard water leads to quicker and more substantial limescale buildup. Conversely, if your area has soft water or you primarily use filtered water, you might be able to extend the interval to every three months.
- Usage Frequency: How often do you use your electric milk steamer? If you’re a daily barista, whipping up multiple lattes and cappuccinos throughout the day, your steamer will accumulate scale faster than someone who uses it only once or twice a week. Frequent users should lean towards the more frequent end of the descaling spectrum, opting for a monthly or bi-monthly schedule.
Beyond these factors, always pay attention to the visible signs that your steamer needs descaling. If you notice any of the performance issues or visible deposits mentioned earlier, don’t wait for your scheduled descaling date; address the issue promptly. Proactive descaling not only ensures consistent performance but also protects your investment by preventing long-term damage caused by excessive mineral buildup.
Tips for Maintaining Your Electric Milk Steamer and Preventing Scale Buildup
Regular descaling is paramount, but consistent daily maintenance can significantly reduce the rate of limescale buildup and keep your electric milk steamer running smoothly between deep cleans. Incorporating these simple habits into your routine will extend your appliance’s life and ensure every frothing experience is exceptional.
The most important tip is to rinse immediately after every use. Milk residues can dry and harden quickly, becoming a breeding ground for bacteria and making future cleaning much more difficult. After frothing, empty any leftover milk and rinse the steamer’s interior thoroughly with warm water. For removable parts like whisks or lids, wash them with warm, soapy water after each use. Secondly, consider using filtered water if you live in a hard water area. Filtered water contains fewer minerals, which directly translates to less limescale buildup over time. While it won’t eliminate the need for descaling entirely, it can drastically extend the time between treatments.
Beyond immediate post-use rinsing, commit to regular cleaning. This means wiping down the exterior with a damp cloth to remove any spills and ensuring all parts are clean. Finally, allow your steamer’s components to air dry completely before reassembling or storing. This prevents moisture-related issues and helps inhibit bacterial growth. By adopting these simple yet effective maintenance practices, you’ll not only keep your electric milk steamer cleaner but also prolong its efficiency and the quality of your frothed milk.
Troubleshooting Common Descaling Issues
Even with the best intentions, you might encounter a few hiccups during or after descaling your electric milk steamer. Don’t worry, these issues are often simple to resolve with a bit of troubleshooting. Being prepared for common problems ensures a smooth and effective descaling process.
One frequent issue is persistent scale even after a descaling cycle. If you still see visible mineral deposits or notice reduced performance, it likely means the buildup was more severe than anticipated. In this case, you can repeat the descaling process, perhaps allowing the solution to soak for a longer duration (e.g., 30-60 minutes), or consider switching to a stronger commercial descaler if your appliance manual permits. Always double-check that the commercial descaler is safe for your specific steamer’s materials. Another common concern is a lingering vinegar odor after descaling with white vinegar. This can be easily remedied by performing additional rinse cycles with fresh water. For a more immediate solution, you can add a pinch of baking soda to one of the fresh water rinse cycles. Baking soda is a natural odor neutralizer; just be sure to follow with another pure water rinse to remove any baking soda residue. Lastly, if your machine isn’t turning on or functioning correctly after descaling, first ensure all components are thoroughly dry and correctly reassembled. Check that it’s properly plugged into a functioning power outlet. If the issue persists, consult your manufacturer’s manual for specific troubleshooting steps or contact their customer support, as there might be an underlying electrical problem unrelated to the descaling itself.
Conclusion
Descaling your electric milk steamer is far more than just a chore; it’s a vital ritual that ensures the longevity, efficiency, and exceptional performance of your beloved appliance. Throughout this guide, we’ve explored why mineral buildup is detrimental, how to recognize its signs, and provided clear, actionable steps for effectively removing limescale using accessible methods like white vinegar, citric acid, or commercial descalers. Consistent maintenance, including immediate rinsing after use and the optional use of filtered water, further contributes to keeping your steamer in pristine condition.
By embracing regular descaling, you’re not just cleaning a machine; you’re safeguarding your ability to create consistently delicious, perfectly frothed milk for your favorite coffee beverages. A well-maintained electric milk steamer delivers superior heat transfer, optimal frothing consistency, and a pure, unadulterated taste that elevates every cup. Don’t let limescale compromise your home barista experience or shorten the life of your investment. Make descaling a routine part of your appliance care, and you’ll be rewarded with perfect froth every time.
What’s your go-to frothed milk creation that you can’t wait to enjoy with a perfectly descaled electric milk steamer?
Frequently Asked Questions
What is the best descaling solution for an electric milk steamer?
|
Our Picks for the Best Milk steamer in 2026
As an Amazon Associate I earn from qualifying purchases.
|
||
| Num | Product | Action |
|---|---|---|
| 1 | Electric Milk Frother and Steamer, 16.9oz/500ml Milk Steamer and Frother for Latte, Dishwasher Safe, BPA Free, 4 Functions, Enjoy Perfect Milk Froth in 2 Min |

|
| 2 | Milk Frother and Steamer, Large Capacity & Detachable Electric Milk Frother, Automatic Warm and Cold Foam Maker, Hot Chocolate Maker, Stainless Steel Jug, 30.44Oz./900ML |
|
| 3 | Large Electric Milk Frother and Steamer, 16.9oz/500ml Milk Steamer and Frother for Latte or Hot Chocolate, Dishwasher Safe, 6 Functions, Enjoy Perfect Milk Froth in 2 Min (White-Glass) |
|
| 4 | HAUSHOF Milk Frother, 4-in-1 Electric Milk Frother and Steamer, Large Capacity, Hot Chocolate Maker, Automatic Warm and Cold Foam Maker for Coffee, Latte, Macchiato, Cappuccino |
|
| 5 | Milk Frother, Paris Rhône 4-in-1 Milk Steamer and Frother, Hot & Cold Foam Milk Warmer with Temperature Control, Auto Shut-Off Frothers for Coffee, Latte, Cappuccino, Macchiato |
|
| 6 | Milk Frother, 4-in-1 Electric Milk Steamer, 350ml/11.8oz Automatic Frother Machine for Coffee, Warm and Cold Foam, Temperature Control for Latte, Cappuccino, Hot Chocolate |
|
| 7 | SIMPLETASTE Milk Frother, 4-in-1 Electric Milk Frother and Steamer, Automatic Warm and Cold Foam Maker and Milk Warmer for Latte, Cappuccinos, Dark Blue |
|
| 8 | Milk Frother, 4-in-1 Milk Frother and Steamer, 10.6oz Electric Milk Steamer, Automatic Cold and Hot Foam maker for Lattes, Cappuccinos, Ceramic Lining Interior (Polished) |
|
| 9 | SIMPLETASTE Milk Frother, 4-in-1 Electric Milk Steamer, Automatic Warm and Cold Foam Maker and Milk Warmer for Latte, Cappuccinos, Macchiato |
|
| 10 | SIMPLETASTE Milk Frother, 4-in-1 Electric Milk Steamer, Automatic Warm and Cold Foam Maker and Milk Warmer for Latte, Cappuccinos, Macchiato |
|
The best descaling solution often depends on personal preference and the severity of the buildup. White vinegar mixed with water in a 1:1 ratio is a popular, natural, and effective choice for general descaling. For a natural and odorless alternative, citric acid is also highly effective. Commercial descalers are available for more severe buildup and are specifically designed for appliances, but always check compatibility with your steamer.
How often should I descale my electric milk steamer?
For most users, descaling your electric milk steamer every 1 to 3 months is a good general guideline. However, if you live in an area with hard water or use your steamer very frequently, you might consider descaling it monthly. Always look for signs like reduced performance or visible mineral deposits, which indicate it’s time for a clean, regardless of the schedule.
Can I use dish soap to descale my milk steamer?
No, dish soap is suitable for cleaning milk residue and general hygiene, but it is not effective for descaling. Descaling requires an acidic solution (like vinegar, citric acid, or a commercial descaler) to dissolve mineral deposits. Dish soap is a surfactant and will not break down limescale. Always use an appropriate descaling agent for mineral buildup.