Craving a creamy latte or a rich cappuccino but don’t own a milk steamer? You’re not alone. Many home baristas dream of cafe-quality drinks without the hefty price tag or countertop clutter of specialized equipment. The good news is, you can achieve wonderfully frothed and steamed milk right in your kitchen using a simple microwave and a glass jar. This ingenious hack transforms ordinary milk into a luxurious, velvety topping, elevating your coffee experience in minutes.
What is Microwave Steamed Milk? The Glass Jar Hack Explained
|
Our Picks for the Best Milk steamer in 2026
As an Amazon Associate I earn from qualifying purchases.
|
||
| Num | Product | Action |
|---|---|---|
| 1 | Milk Frother, Paris Rhône 4-in-1 Milk Steamer and Frother, Hot & Cold Foam Milk Warmer with Temperature Control, Auto Shut-Off Frothers for Coffee, Latte, Cappuccino, Macchiato |

|
| 2 | HAUSHOF Milk Frother, 4-in-1 Electric Milk Frother and Steamer, Large Capacity, Hot Chocolate Maker, Automatic Warm and Cold Foam Maker for Coffee, Latte, Macchiato, Cappuccino |
|
| 3 | SIMPLETASTE Milk Frother, 4-in-1 Electric Milk Steamer, Automatic Warm and Cold Foam Maker and Milk Warmer for Latte, Cappuccinos, Macchiato |
|
| 4 | Milk Frother and Steamer, Large Capacity & Detachable Electric Milk Frother, Automatic Warm and Cold Foam Maker, Hot Chocolate Maker, Stainless Steel Jug, 30.44Oz./900ML |
|
| 5 | Milk Frother, 4-in-1 Electric Milk Steamer, 350ml/11.8oz Automatic Frother Machine for Coffee, Warm and Cold Foam, Temperature Control for Latte, Cappuccino, Hot Chocolate |
|
| 6 | Electric Milk Frother and Steamer, 16.9oz/500ml Milk Steamer and Frother for Latte, Dishwasher Safe, BPA Free, 4 Functions, Enjoy Perfect Milk Froth in 2 Min |
|
| 7 | Milk Frother, 4-in-1 Milk Frother and Steamer, 10.6oz Electric Milk Steamer, Automatic Cold and Hot Foam maker for Lattes, Cappuccinos, Ceramic Lining Interior (Polished) |
|
| 8 | Large Electric Milk Frother and Steamer, 16.9oz/500ml Milk Steamer and Frother for Latte or Hot Chocolate, Dishwasher Safe, 6 Functions, Enjoy Perfect Milk Froth in 2 Min (White-Glass) |
|
| 9 | SIMPLETASTE Milk Frother, 4-in-1 Electric Milk Steamer, Automatic Warm and Cold Foam Maker and Milk Warmer for Latte, Cappuccinos, Macchiato |
|
| 10 | SIMPLETASTE Milk Frother, 4-in-1 Electric Milk Frother and Steamer, Automatic Warm and Cold Foam Maker and Milk Warmer for Latte, Cappuccinos, Dark Blue |
|
Microwave steamed milk, often referred to as the “glass jar hack,” is a clever method to create frothy, warm milk without a traditional steam wand or automatic frother. At its core, this technique replicates the agitation and heating processes of professional equipment using common household items. First, you vigorously shake milk in a sealed jar to incorporate air, forming a light foam. Then, a quick zap in the microwave heats the milk and, crucially, stabilizes these delicate air bubbles, preventing them from collapsing too quickly. This results in a stable, rich foam perfect for lattes, cappuccinos, or hot chocolate.
This method is particularly valuable for its simplicity and accessibility. It requires no specialized skills or expensive gadgets, making it an ideal solution for students, budget-conscious coffee lovers, or anyone looking for a quick fix without sacrificing quality. The benefits extend beyond cost-effectiveness; it’s also incredibly fast, allowing you to enjoy a gourmet beverage in just a few steps.
Essential Tools for the Glass Jar Hack
Before you embark on your journey to microwave-steamed milk perfection, gather these simple items. You likely already have them lying around your kitchen:
- A Microwave-Safe Glass Jar with a Tight-Fitting Lid: A Mason jar is perfect for this, but any clean glass container that can withstand microwave heat and has a secure lid will do. The lid is critical for shaking without spills, and being microwave-safe ensures it won’t crack or melt.
- Your Preferred Milk: While whole milk typically produces the richest, most stable foam due to its fat content, you can experiment with 2%, skim, or even non-dairy alternatives like almond, soy, or oat milk. Just be aware that some non-dairy options may require more vigorous shaking or yield a slightly different texture.
- A Microwave Oven: Essential for the heating and foam-setting stage.
Step-by-Step Guide: Steaming Milk in Your Microwave
Ready to transform your milk? Follow these straightforward steps for perfect microwave-steamed milk every time:
- Pour the Milk: Start by pouring your cold milk into the glass jar. Crucially, do not fill the jar more than halfway. This provides ample space for the milk to expand and froth as air is incorporated. Too much milk will prevent proper frothing and could lead to overflow.
- Secure the Lid and Shake Vigorously: Tightly screw the lid onto the jar. Now, shake the jar with enthusiasm! Shake vigorously for about 30 to 60 seconds. You’re aiming for the milk to double in volume and become noticeably frothy. This is where you manually incorporate air, creating those tiny bubbles that form the foam. It can be a bit of a workout, but it’s worth it!
- Remove the Lid and Microwave: Once your milk is frothy and its volume has increased, remove the lid completely. This is a vital step; microwaving a sealed container can be dangerous. Place the uncovered jar in your microwave and heat on high for approximately 30 to 45 seconds. The exact time may vary depending on your microwave’s wattage and the amount of milk, so start with 30 seconds and add 10-second bursts if needed. The heat stabilizes the foam, preventing it from collapsing, and warms the milk to an ideal serving temperature. Aim for warm, not boiling, milk.
- Serve Immediately: Carefully remove the hot jar from the microwave. The frothed milk will have separated, with warm liquid milk at the bottom and a thick layer of foam on top. Pour the liquid milk into your coffee or other beverage, holding back the foam with a spoon. Then, spoon the rich, fluffy foam over the top.
Pro Tips for Perfect Microwave Steamed Milk
Achieving barista-level foam with this hack is entirely possible with a few expert insights:
- Start Cold: Cold milk froths more effectively than room-temperature milk. Ensure your milk is straight from the refrigerator for the best results.
- Don’t Overfill: The “halfway full” rule is paramount. Giving the milk enough room to expand allows for maximum air incorporation and froth volume.
- Shake with Purpose: The more vigorously and consistently you shake, the finer and more abundant your foam will be. Think of it as a mini arm workout for a delicious reward.
- Mind the Microwave Time: Overheating can scald the milk or cause the foam to break down. Pay close attention to the milk; it should be hot to the touch but not boiling. Around 140-150°F (60-65°C) is ideal for flavor and foam stability.
- Consider Milk Type: While whole milk generally yields the densest and creamiest foam, many non-dairy milks (especially oat and soy barista blends) can also produce impressive results. Skim milk will produce a lighter, airier foam. Experiment to find your favorite!
- Tap and Swirl: After microwaving, gently tap the jar on your countertop a couple of times. This helps to break up any large, unstable bubbles, resulting in a silkier microfoam. A slight swirl can also further integrate the foam.
“To create perfect milk foam, starting with cold milk and shaking it with intent are your secret weapons. The microwave then acts as a magic wand, setting that beautiful foam in place.”
Common Issues and Troubleshooting
Even with a simple hack, you might encounter a few hiccups. Here are common problems and how to fix them:
- Milk Not Frothing:
- Cause: The jar might be too full, not enough shaking, or the milk wasn’t cold enough.
- Fix: Ensure the jar is no more than halfway full. Shake more vigorously for a longer duration (up to 60 seconds). Use milk straight from the refrigerator.
- Foam is Too Thin or Disappears Quickly:
- Cause: Milk was overheated, shaken too gently, or the wrong type of milk was used.
- Fix: Reduce microwave time slightly. Shake more vigorously. If using non-dairy milk, try a “barista blend” designed for frothing, or switch to whole milk if possible. The heat from the microwave is crucial for stabilizing the foam, so don’t cut this step short, but also avoid boiling.
- Milk Scorch Marks or Curdling:
- Cause: Milk was microwaved for too long or at too high a power.
- Fix: Always remove the lid before microwaving. Heat in shorter bursts (e.g., 20 seconds, then check, then 10 more) to prevent scorching. Stirring after each burst (if heating first, though shaking first is the recommended hack) can help.
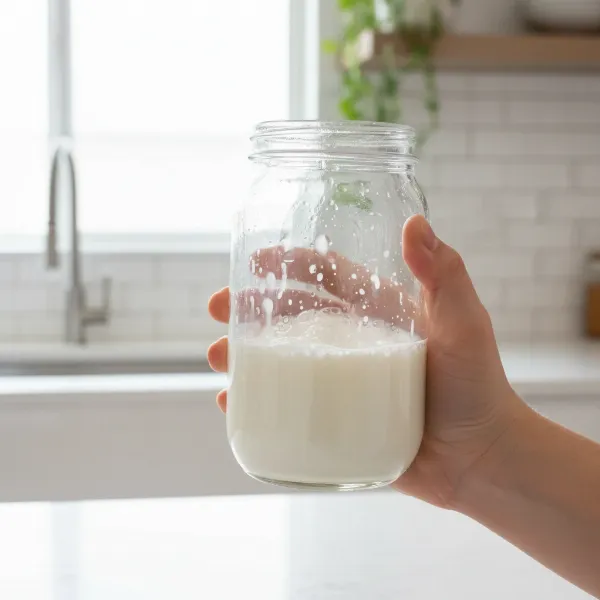 A hand vigorously shaking a glass jar filled halfway with milk to create foam.
Conclusion
The glass jar and microwave hack offers a remarkably simple yet effective way to enjoy luscious, frothed milk for your favorite beverages without investing in a dedicated milk steamer. By following a few easy steps—shaking cold milk in a jar and then briefly microwaving it—you can consistently create beautiful, stable foam. This method proves that you don’t need fancy equipment to elevate your home coffee experience, bringing the joy of creamy lattes and cappuccinos right to your fingertips. So, why not give this ingenious trick a try and discover the surprisingly delightful results for yourself?
Frequently Asked Questions
What type of milk works best for the microwave glass jar hack?
Whole milk is generally recommended for the microwave glass jar hack as its higher fat content produces a richer, creamier, and more stable foam. However, 2% milk, skim milk, and many non-dairy options like oat or soy barista blends can also froth well with vigorous shaking and proper heating. Experimentation is key to finding your preferred texture and taste.