Ever look at your homemade latte and feel a pang of disappointment? You’ve brewed the perfect espresso, but the “foam” on top is a sad, bubbly mess that vanishes in seconds. You’re not alone. The quest for How To Get Thick Milk Foam at home can feel like chasing a ghost. It’s that velvety, dense, and glossy microfoam that holds its shape, feels luxurious on your tongue, and is the perfect canvas for latte art. The good news? It’s not magic. It’s science, and I’m here to break it down for you, turning your kitchen into your favorite new coffee shop.
What’s a Milk Steamer and Why Is It a Game-Changer?
Before we dive into the “how,” let’s talk about the “what.” A milk steamer or frother is a device designed to do two things simultaneously: heat milk and aerate it by injecting air. This process creates a stable structure of tiny, uniform bubbles called microfoam. This isn’t just about bubbles; it’s about transforming the milk’s texture and taste, making it sweeter and creamier, and the perfect partner for strong espresso. Forget spooning big, airy bubbles onto your coffee—we’re aiming for something closer to melted ice cream.
Know Your Frother: A Quick Rundown of the Main Types
The tool you use has a big impact on your results. While you can technically make foam in a French press or by shaking a jar (bless your heart for trying), a dedicated frother is your ticket to consistency.
The Handheld Whiz
This is the battery-operated wand frother. It’s affordable, portable, and a great starting point. It excels at adding air but doesn’t heat the milk, so you’ll need to do that separately. It’s fantastic for a quick cappuccino but can be tricky to create the silky microfoam needed for latte art.
The Automatic Miracle Worker
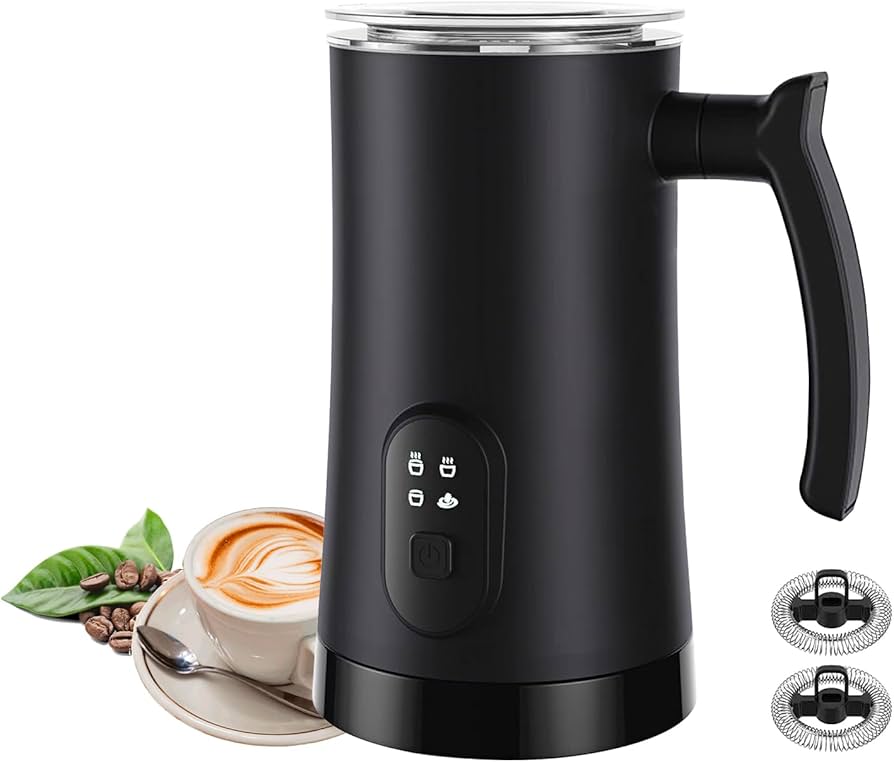
These are the countertop jug-style frothers. They are the definition of “set it and forget it.” You pour in cold milk, press a button, and a few minutes later, you have perfectly heated and frothed milk. Many models even have different settings for lattes, cappuccinos, or cold foam. They are the most reliable option for consistently getting thick milk foam with minimal effort.
|
Our Picks for the Best Milk Steamer in 2025
As an Amazon Associate, we earn from qualifying purchases.
|
||
| Num | Product | Action |
|---|---|---|
| 1 | Subminimal NanoFoamer Pro Gen-2 – Revolutionary Hands-Free Microfoam Milk Maker for Cafe-Quality Foam, Coffee Bar Accessories for Dairy & Plant-Based Milk, Perfect Coffee Gifts – US Plug Type |

|
| 2 | Milk Frother and Steamer, Large Capacity Detachable Electric Milk Frother, Automatic Warm and Cold Foam Maker, Stainless Steel Jug, BPA Free |
|
| 3 | SIMPLETASTE Milk Frother, 4-in-1 Electric Milk Steamer, Automatic Warm and Cold Foam Maker and Milk Warmer for Latte, Cappuccinos, Macchiato |
|
| 4 | Dreo Milk Frother [Upgraded], All-in-1 Electric Foam Maker for Coffee, 15oz/450ml Automatic Foam Frother for Latte Art-level Microfoam, 30+ Drinks, Dishwasher Safe, Easy to Clean, LED display |
|
| 5 | SIMPLETASTE Milk Frother, 4-in-1 Electric Milk Steamer, Automatic Warm and Cold Foam Maker and Milk Warmer for Latte, Cappuccinos, Macchiato |
|
| 6 | Dreo Milk Frother [Upgraded], All-in-1 Electric Foam Maker for Coffee, 15oz/450ml Automatic Foam Frother for Latte Art-level Microfoam, 30+ Drinks, Dishwasher Safe, Easy to Clean, LED display |
|
| 7 | Milk Frother and Steamer, Large Capacity Detachable Electric Milk Frother, Automatic Warm and Cold Foam Maker, Hot Chocolate Maker, BPA Free, Black |
|
| 8 | Instant Pot Milk Frother, 4-in-1 Electric Milk Steamer, 10oz/295ml Automatic Hot and Cold Foam Maker and Milk Warmer for Latte, Cappuccinos, Macchiato, From the Makers of Instant 500W, Black |
|
| 9 | Electric Milk Frother and Steamer, 16.9oz/500ml Milk Steamer and Frother for Latte, Dishwasher Safe, BPA Free, 4 Functions, Enjoy Perfect Milk Froth in 2 Min - White |
|
| 10 | Nespresso Aeroccino 3 Milk Frother, Black, Steel |
|
The Espresso Machine Steam Wand
This is the pro-level tool, integrated into semi-automatic and automatic espresso machines. It uses high-pressure steam to both heat and texture the milk. There’s a steeper learning curve, but mastering a steam wand gives you ultimate control over the texture and temperature, allowing you to create true barista-quality foam.
The Secret Sauce: How to Get Thick Milk Foam Step-by-Step
Alright, let’s get to the main event. Regardless of your tool, the core principles of creating luxurious foam are the same. Follow these steps, and you’ll be on your way to foam nirvana.
- Start with Cold Milk (The Colder, The Better): This is the most important rule. Seriously. Cold milk gives you more time to introduce air before it gets too hot. The proteins in milk are most stable when cold, allowing them to create a strong bubble structure. Use milk straight from the back of the fridge, not the door.
- Choose the Right Milk (Fat is Your Friend): While you can froth most types of milk, whole dairy milk is the undisputed champion for creating thick, creamy foam. The higher fat and protein content create a more stable and flavorful result. We’ll talk more about non-dairy options in a bit.
- The “Stretching” Phase: Introduce Air: This is the first 10-20 seconds of the process. You want to introduce air into the milk to create volume.
- With a Steam Wand: Keep the tip of the wand just below the surface of the milk. You should hear a gentle “tss-tss-tss” or hissing sound, like paper tearing. This is the sound of air being incorporated. The milk volume should increase by about 30-50%.
- With an Automatic Frother: The machine does this for you! The whisk is designed to pull air into the milk as it spins.
- With a Handheld Frother: Keep the whisk head near the top of the milk, creating a vortex and pulling in air.
- The “Texturing” Phase: Create the Vortex: Once you’ve added enough air, it’s time to incorporate it. The goal is to break down large bubbles into a uniform, silky microfoam.
- With a Steam Wand: Plunge the wand deeper into the milk, positioning it off-center to create a whirlpool or vortex. This spinning motion folds the air into the milk, refining the texture. Tilt your pitcher to help the vortex form.
- With an Automatic Frother: Again, the machine handles this beautifully, creating a perfect vortex to ensure a smooth texture.
- Hit the Sweet Spot: Temperature Matters: Stop frothing when the milk reaches 140-150°F (60-65°C). Any hotter, and the proteins will break down, causing the foam to collapse and the milk to taste scalded. A good rule of thumb: when the pitcher is just getting too hot to comfortably hold, you’re there.
- Tap and Swirl: The Finishing Touch: Once you’re done, give the pitcher a firm tap or two on the counter to pop any large, remaining bubbles. Then, swirl the milk in the pitcher for about 20-30 seconds. This polishes the foam, giving it a beautiful, wet-paint-like sheen and ensuring it’s perfectly integrated. Now, you’re ready to pour!
Pro Tips for Foam That’s So Thick You Can Eat It with a Spoon
Want to take your skills from good to great? Here are a few insider tricks.
- The Great Milk Debate: For dairy, whole milk is king. The combination of fat and protein provides the best structure and flavor. 2% milk works well too, but the foam will be a bit lighter. Skim milk creates a lot of stiff, dry foam, but it lacks creaminess and flavor.
- Conquering Non-Dairy: Getting thick foam from plant-based milks can be a challenge. Look for “Barista Edition” versions of your favorite oat, soy, or almond milk. These are specially formulated with added proteins and stabilizers to help them froth beautifully. Oat milk is generally the best performer among non-dairy options.
- Use a Cold Pitcher: For those using a steam wand, popping your stainless steel frothing pitcher in the freezer for a few minutes beforehand will keep your milk colder for longer, giving you more time to perfect your technique.
“The biggest mistake beginners make is starting with warm milk. You’re losing the game before it even begins. Cold milk gives you a longer runway to build that perfect texture. Always start with milk that’s as cold as you can get it.” – Clara Reyes, Head Barista at The Daily Grind.
Keeping Your Frother in Tip-Top Shape
A clean frother is a happy frother. Milk residue can not only harbor bacteria but also affect the taste of your next drink and the performance of your machine.
- Steam Wands: Purge the wand by running steam through it for a second before and after each use. Wipe it down immediately with a damp cloth after frothing. Don’t let milk dry on it!
- Automatic Frothers: Wash the jug and whisk immediately after use with warm, soapy water. Most are non-stick, making cleanup a breeze. Check if your model’s parts are dishwasher safe.
- Handheld Frothers: Simply run the whisk head under hot water or pulse it for a few seconds in a cup of soapy water, then rinse.
What Should I Look for When Buying a Milk Frother?
If you’re in the market for a new device to help you learn how to get thick milk foam, consider these factors:
- Type: Do you want the control of a steam wand, the convenience of an automatic, or the simplicity of a handheld?
- Heating Function: If you don’t want to microwave your milk first, an automatic frother or steam wand with a heating function is a must.
- Capacity: How many drinks will you be making at once? Choose a size that fits your needs.
- Ease of Cleaning: Look for non-stick interiors and dishwasher-safe parts. This is a huge quality-of-life feature.
Frequently Asked Questions About Thick Milk Foam
Why is my milk foam not thick?
The most common reasons are using milk that isn’t cold enough, not incorporating enough air during the “stretching” phase, or overheating the milk, which causes the protein structure to break down. Using old milk can also be a factor, as its proteins weaken over time.
Can you froth warm milk?
Technically, yes, but you won’t get good results. Frothing relies on stretching cold milk proteins. Starting warm gives you almost no time to incorporate air before the milk gets too hot, resulting in thin, weak foam. Always start cold for thick, stable foam.
What’s the best non-dairy milk for thick foam?
Barista-edition oat milk is widely considered the best non-dairy alternative for creating thick, creamy foam that’s great for lattes and even latte art. Barista-style soy and almond milks are also solid contenders. Regular versions often lack the necessary protein and fat content.
How long should I froth milk?
This depends on your device, but typically it takes between 60 and 90 seconds. With a steam wand, you’re looking for a temperature rise to about 140°F. For automatic frothers, just follow the machine’s cycle. The key is to stop before the milk gets too hot.
Does the type of milk frother matter for foam thickness?
Absolutely. A high-pressure steam wand offers the most control and potential for the silkiest microfoam. However, a quality automatic frother is the most reliable and consistent way for most people to get excellent thick foam at home with minimal practice. Handheld frothers can create thick foam, but it’s often more bubbly and less integrated.
Mastering how to get thick milk foam is a journey, but it’s one that completely transforms your at-home coffee experience. It elevates a simple drink into a daily luxury. By starting with cold milk, choosing the right type, and paying attention to your technique, you can stop dreaming about café-quality lattes and start making them yourself. So go ahead, grab your frother, and get ready to pour something beautiful.