Have you ever craved a perfectly warm, comforting beverage without the fluff of foam? Perhaps a steaming hot chocolate, a soothing tea latte, or simply warm milk for your morning coffee or a baby’s bottle? Many modern milk steamers and frothers come equipped with a versatile “heating only” function, designed to warm milk to the ideal temperature without introducing a creamy texture. This feature transforms your device into a dedicated milk warming powerhouse, offering convenience and precision for a variety of drinks and needs. Understanding how to harness this specific function is key to unlocking the full potential of your milk steamer and elevating your home beverage experience.
What is the “Heating Only” Function on a Milk Steamer?
At its core, the heating-only function on a milk steamer or frother is designed to warm milk to a desired temperature without aerating it or creating a significant layer of foam. While many devices are celebrated for their ability to whip up light, airy foam for cappuccinos or dense microfoam for lattes, the “heat only” setting focuses purely on temperature. You’ll often find this referred to as “hot milk,” “simple milk heating,” or “warming milk” on various models. It’s a distinct mode that separates the heating element from the frothing mechanism, or significantly reduces its action, ensuring your milk is warmed smoothly and evenly.
The primary difference lies in the internal mechanics. When you select a frothing setting, a whisk or agitator works vigorously to incorporate air into the milk while it heats. For the heating-only function, this whisking action is either entirely absent, or it’s a very gentle stir intended only to circulate the milk for consistent heating, preventing scorching. This results in warm, liquid milk that retains its original texture, making it ideal for those who prefer their drinks unfoamed.
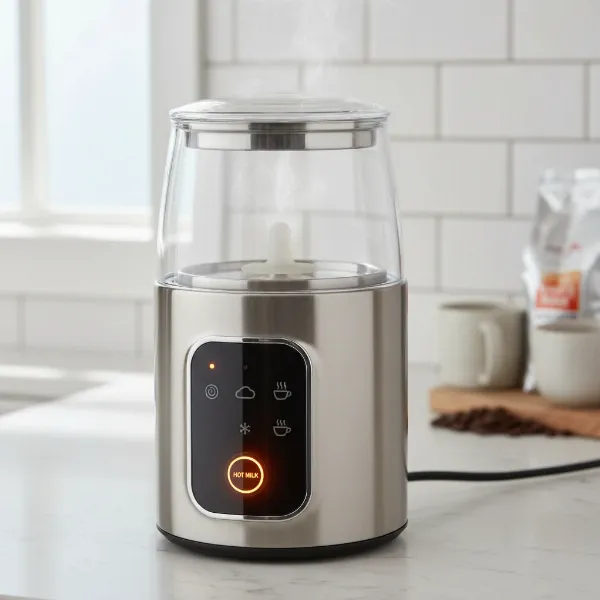 A milk steamer showing the heating only function selected, contrasting with frothing.
Why Choose the Heating Only Function?
The heating-only function on your milk steamer offers a surprising array of benefits and applications beyond traditional coffee beverages. It’s a testament to the versatility of these kitchen gadgets, proving they’re more than just a one-trick pony for frothy delights.
One of the most popular uses is for crafting exquisite hot chocolate. To achieve that rich, velvety consistency, you need warm milk as a smooth base, not foamy milk that can separate from the chocolate. The heating-only setting ensures your cocoa powder or chocolate shavings dissolve beautifully, creating a seamless, indulgent drink. Similarly, for tea lattes like a London Fog or chai latte, perfectly warm milk allows the tea flavors to shine through without the distraction of a thick foam layer. It provides a comforting warmth that integrates seamlessly with the tea.
Beyond these classic comforts, the warm milk function is also incredibly practical. It’s excellent for preparing a warm base for coffee, ensuring your brew stays hot without diluting it with cold milk. For parents, it’s a game-changer for quickly and safely warming baby bottles to the perfect temperature. Instead of wrestling with microwaves or stovetop pans, which can create hot spots, a milk steamer warms milk gently and uniformly, ensuring it’s safe and palatable for infants. Furthermore, it’s a fantastic tool for preparing warm milk for cereals, oatmeal, or any recipe that calls for heated milk as an ingredient.
 Assortment of beverages and items utilizing warm milk, including hot chocolate and a baby bottle.
Step-by-Step Guide: Using Your Automatic Milk Steamer for Warm Milk
Using the heating-only function on an automatic milk steamer is typically a straightforward process designed for maximum convenience. Follow these steps to achieve perfectly warm milk without the froth.
Preparation
|
Our Picks for the Best Milk steamer in 2026
As an Amazon Associate I earn from qualifying purchases.
|
||
| Num | Product | Action |
|---|---|---|
| 1 | Milk Frother and Steamer, Large Capacity & Detachable Electric Milk Frother, Automatic Warm and Cold Foam Maker, Hot Chocolate Maker, Stainless Steel Jug, 30.44Oz./900ML |

|
| 2 | Electric Milk Frother and Steamer, 16.9oz/500ml Milk Steamer and Frother for Latte, Dishwasher Safe, BPA Free, 4 Functions, Enjoy Perfect Milk Froth in 2 Min |
|
| 3 | SIMPLETASTE Milk Frother, 4-in-1 Electric Milk Frother and Steamer, Automatic Warm and Cold Foam Maker and Milk Warmer for Latte, Cappuccinos, Dark Blue |
|
| 4 | Milk Frother, 4-in-1 Electric Milk Steamer, 350ml/11.8oz Automatic Frother Machine for Coffee, Warm and Cold Foam, Temperature Control for Latte, Cappuccino, Hot Chocolate |
|
| 5 | SIMPLETASTE Milk Frother, 4-in-1 Electric Milk Steamer, Automatic Warm and Cold Foam Maker and Milk Warmer for Latte, Cappuccinos, Macchiato |
|
| 6 | Milk Frother, 4-in-1 Milk Frother and Steamer, 10.6oz Electric Milk Steamer, Automatic Cold and Hot Foam maker for Lattes, Cappuccinos, Ceramic Lining Interior (Polished) |
|
| 7 | Milk Frother, Paris Rhône 4-in-1 Milk Steamer and Frother, Hot & Cold Foam Milk Warmer with Temperature Control, Auto Shut-Off Frothers for Coffee, Latte, Cappuccino, Macchiato |
|
| 8 | Large Electric Milk Frother and Steamer, 16.9oz/500ml Milk Steamer and Frother for Latte or Hot Chocolate, Dishwasher Safe, 6 Functions, Enjoy Perfect Milk Froth in 2 Min (White-Glass) |
|
| 9 | SIMPLETASTE Milk Frother, 4-in-1 Electric Milk Steamer, Automatic Warm and Cold Foam Maker and Milk Warmer for Latte, Cappuccinos, Macchiato |
|
| 10 | HAUSHOF Milk Frother, 4-in-1 Electric Milk Frother and Steamer, Large Capacity, Hot Chocolate Maker, Automatic Warm and Cold Foam Maker for Coffee, Latte, Macchiato, Cappuccino |
|
- Start with Cold, Fresh Milk: Always begin with cold milk, straight from the refrigerator. Cold milk gives the steamer enough time to heat evenly to the optimal temperature. Fresh milk also provides the best taste and texture.
- Clean Your Steamer: Before each use, ensure the inside of your milk steamer is clean. Any residue from previous uses can affect the taste and potentially cause scorching.
- Fill to the Correct Line: Most automatic milk frothers and steamers have clear minimum and maximum fill lines marked inside the jug. When using the heating-only function, you will generally fill the milk to the upper maximum line—often designated specifically for “hot milk” or “no froth.” This is usually higher than the maximum line for frothing, as the milk won’t expand significantly with foam. Avoid overfilling, as this can lead to spills.
- Remove or Use Specific Whisk: Some steamers come with multiple whisk attachments: one for frothing and sometimes a separate, flatter stirrer for heating only. If your model has interchangeable parts, ensure you’re using the correct one (or no whisk if that’s an option for heating). If it’s a fixed whisk, the machine’s programming will simply reduce its agitation on the “heat only” setting.
Operation
- Select the “Heat Only” Function: Locate the control button or knob on your milk steamer. Many devices offer different modes activated by a single press, a double press, or holding the button down for a few seconds. Look for an indicator light (often red for hot settings, sometimes blue for cold) or a specific icon for “hot milk” or “warming.” For example, on some Nespresso Aeroccino models, a quick press might initiate hot frothing, while a single press with a specific, non-frothing whisk might be for hot milk.
- Start the Cycle: Once the desired “heat only” function is selected, press the start button. The machine will begin its automated cycle of heating.
- Monitoring and Results: Automatic milk steamers are designed for hands-free operation. The heating cycle typically lasts between 60 to 90 seconds, bringing the milk to an ideal drinking temperature of around 55-65°C (130-150°F). Most models will automatically shut off once the process is complete, often indicated by a change in light or an audible beep. The result should be smooth, warm milk with minimal to no foam.
Serving
Carefully pour the warm milk into your beverage or mug. Always exercise caution, as the milk and the frother’s jug will be hot.
Using a Steam Wand for Warm Milk (Manual Method)
For those with an espresso machine featuring a steam wand, you have a powerful tool for heating milk precisely. While often associated with frothing, a steam wand can also create perfectly warm milk with little to no foam by adjusting your technique.
Preparation
- Use Cold Milk and a Cold Pitcher: Always start with fresh, cold milk and a clean, cold stainless steel milk pitcher. Coldness provides a longer window for heating and texturing.
- Purge the Steam Wand: Before submerging the wand into milk, always “purge” it. Briefly open the steam valve to release any condensed water inside the wand. This ensures you’re injecting pure steam, not water, into your milk.
Technique for Heating (Minimal Foam)
- Submerge the Wand Deeply: Unlike frothing, where the wand tip is kept just below the surface to introduce air, for heating milk with minimal foam, you should submerge the steam wand deeper into the milk. Position the tip about half to two-thirds of the way down into the milk, slightly off-center.
- Create a Gentle Vortex: Angle the pitcher slightly to create a gentle swirling motion, a “vortex,” in the milk as the steam is released. This circulation ensures even heating and helps prevent any significant foam from forming. Keep the wand tip submerged, not breaking the surface, to avoid introducing air.
- Maintain Consistent Steam: Turn the steam valve to full power. Listen for a smooth, consistent “hissing” sound, rather than a harsh screeching or gurgling.
Temperature Control
- The “Hand-Feel” Method: The most common way baristas gauge temperature is by feeling the side of the metal pitcher. Continue heating until the pitcher becomes almost too hot to comfortably hold for more than 2-3 seconds. This typically corresponds to the ideal temperature range of 55-65°C (130-150°F).
- Using a Thermometer: For precise control, especially when first learning or warming milk for delicate uses like baby bottles, use a frothing thermometer. Aim for the recommended temperature range. Never heat milk above 70°C (160°F), as this can “scald” the milk, altering its taste and nutritional properties.
Post-Use
- Clean Immediately: After removing the pitcher, immediately wipe the steam wand with a clean, damp cloth to remove any milk residue.
- Purge Again: Briefly open the steam valve once more to clear any milk that might have been drawn up into the wand. This prevents blockages and bacterial growth.
Tips for Perfectly Warm Milk Every Time
Achieving consistent, perfectly warm milk with your steamer is an art that can be mastered with a few key insights.
- Milk Type Matters: The type of milk you use can influence the outcome, even when simply heating. Whole dairy milk generally heats beautifully, maintaining a creamy consistency. Low-fat or skim milk will also heat well but might feel slightly thinner. For plant-based milks like oat, almond, or soy, opt for “barista blends” if possible. These versions are formulated to heat more stably and resist separation or developing an unpleasant texture at higher temperatures. Experiment with different brands to find your favorite.
- Optimal Temperature is Key: Avoid heating your milk too hot. Scalded milk develops an unpleasant “cooked” flavor and can lose some of its natural sweetness. Aim for the sweet spot of 55-65°C (130-150°F). If using an automatic frother, trust its internal thermostat; for steam wands, use the hand-feel method or a thermometer.
- Always Start with Cold Milk: This allows for a more gradual and even heating process, reducing the risk of scorching the milk.
- Cleanliness is Non-Negotiable: A dirty milk steamer can impart off-flavors to your milk and harbor bacteria. Residue from burned milk is also notoriously difficult to clean and can affect heating performance. Always rinse or wipe down the jug and whisk (or steam wand) immediately after each use.
- Mind Your Fill Lines: Respecting the minimum and maximum fill lines is crucial. Overfilling can lead to spills, while underfilling might result in the milk not heating properly or potentially burning the bottom of the jug. The heating-only function often allows for a larger volume of milk compared to frothing settings.
Troubleshooting Common Heating Issues
Even with the best intentions, you might occasionally encounter a hiccup when using your milk steamer for warming. Here are some common problems and how to solve them:
- Milk Not Getting Hot Enough:
- Cause: Insufficient heating time (for manual methods) or a machine fault. Could also be due to very cold initial milk or too large a volume for the machine’s capacity.
- Fix: For automatic steamers, ensure you’ve selected the correct setting and allowed the full cycle to complete. If it consistently under-heats, the heating element might be faulty or the machine might not be powerful enough for the volume you’re using. For steam wands, ensure full steam power and sufficient heating duration, checking temperature with your hand or a thermometer.
- Milk Overheating or Scorching:
- Cause: Heating for too long, too high a temperature setting, or insufficient milk volume (causing the element to concentrate heat too much).
- Fix: For automatic steamers, ensure you’re not overriding the auto-shutoff. If the problem persists, try reducing the milk volume slightly. For steam wands, stop heating as soon as the jug is too hot to hold. If a film forms on the milk’s surface or it sticks to the bottom of the pitcher, it’s overheated.
- Still Getting Too Much Foam:
- Cause: Incorrect setting selected, the frothing whisk is still in place (if removable), or the machine’s “heat only” function still incorporates some air. For steam wands, the tip might be too close to the surface, introducing air.
- Fix: Double-check that you’ve selected the dedicated “heat only” or “hot milk” setting. If your steamer has removable parts, ensure the frothing whisk is removed or replaced with a non-frothing stirrer if applicable. For steam wands, ensure the tip is submerged deeply enough and maintain a smooth vortex without breaking the surface.
- Milk Not Circulating/Uneven Heating (Automatic):
- Cause: Blockage in the whisk area, or a small amount of milk making it difficult for the magnet to engage the whisk.
- Fix: Ensure the whisk is properly seated and free of debris. Use at least the minimum fill volume of milk.
Maintaining Your Milk Steamer for Longevity
Proper care and maintenance are crucial for ensuring your milk steamer continues to perform reliably, especially its heating functions. A well-maintained machine not only lasts longer but also consistently delivers the best results.
The most critical aspect of maintenance is cleaning after every use. Milk residues can quickly dry and adhere to the inside of the jug, the whisk, and the heating element, leading to burnt milk smells and impaired performance. For automatic steamers, rinse the jug and whisk under warm water immediately. Many removable components are dishwasher safe, but always check your manual. For steam wands, as mentioned, wipe and purge immediately after each use to prevent blockages.
Regular deep cleaning is also important. Periodically, you may need to use a mild soap and brush for a thorough clean, especially if you notice any discoloration or stubborn residues. Some advanced automatic steamers might benefit from an occasional descaling process, particularly in areas with hard water. Limescale buildup can affect heating efficiency. Refer to your user manual for specific descaling instructions and recommended products.
Finally, proper storage helps prolong the life of your device. Store your milk steamer in a clean, dry place, away from excessive heat or moisture. Ensure all parts are thoroughly dry before reassembling and storing. Taking these simple steps ensures your milk steamer remains a reliable companion for all your warm milk needs, year after year.
Conclusion
Mastering the heating-only function on your milk steamer opens up a world of delightful possibilities, offering a level of convenience and precision unmatched by traditional methods. Whether you’re craving a rich hot chocolate, a comforting tea latte, or simply warming milk for a baby bottle, this feature ensures your milk is perfectly heated without unwanted foam. By understanding the specific settings, following best practices for preparation and operation, and maintaining your appliance diligently, you can consistently achieve that ideal warm, smooth milk every single time. So, go ahead and confidently explore the comforting warmth your milk steamer can bring to your daily rituals.
Frequently Asked Questions
Which milk steamer is best for just heating milk?
Many automatic electric milk frothers include a dedicated “hot milk” or “heating only” setting, often utilizing a specific non-frothing whisk or no whisk at all. Brands like Nespresso Aeroccino, Breville, and Miroco are known for models with this versatile functionality, providing precise temperature control for perfectly warmed, unfoamed milk.
How hot should milk be for a baby bottle?
For baby bottles, milk should be warmed to body temperature, which is approximately 37°C (98.6°F). This is significantly cooler than the temperature for adult beverages. Always test the milk on your wrist before giving it to a baby to ensure it’s not too hot, even if using a steamer’s warming function.
Why does my milk steamer still froth a little even on “heat only”?
Some automatic Milk Steamers may still employ a very gentle stirring action even on the “heat only” setting to ensure even heating and prevent scorching. This minimal movement can sometimes introduce a tiny amount of foam, especially with certain milk types. If significant froth occurs, double-check your settings and ensure you’re using any specific non-frothing attachments provided.
Can I reheat milk in a steamer?
While technically possible, reheating milk in a steamer is generally not recommended. Reheating milk can alter its taste, texture, and nutritional properties, potentially leading to a “cooked” or burnt flavor. For best results, always use fresh, cold milk for warming.