Ever stare into your mug, wondering why your homemade latte looks a little… sad? You’ve got the good coffee, the fancy mug, but the milk is just a bubbly mess instead of that velvety, cloud-like foam you get at your favorite cafe. The secret, my friend, isn’t just the machine; it’s understanding What Is A Frothing Cycle. This automated process is the unsung hero behind every perfect cappuccino and dreamy flat white made at home. It’s the little bit of barista magic programmed right into your countertop device.
Think of it as your milk frother’s personal, pre-programmed routine for transforming cold, flat milk into a work of art. It’s not just random spinning and heating; it’s a carefully orchestrated sequence designed for one thing: foam perfection. So, grab your favorite mug, and let’s pull back the curtain on this game-changing feature.
First, What Exactly is a Milk Steamer and Why Do I Need One?
Before we dive into the cycle itself, let’s get on the same page. A milk steamer, or frother, is a device designed to aerate milk, creating tiny, stable bubbles known as microfoam. This foam is denser, creamier, and smoother than the big, airy bubbles you get from just whisking milk. It’s what gives lattes their silky texture and cappuccinos their signature foamy cap.
Why do you need one? Well, if you’re spending a small fortune on coffee shop drinks every week, a milk frother is your ticket to freedom. It allows you to:
- Elevate your home coffee game: Turn a simple brew into a luxurious cafe-style experience.
- Save money: The device pays for itself in just a few weeks of skipped coffee runs.
- Unleash your creativity: Experiment with lattes, cappuccinos, macchiatos, hot chocolates, and even matcha lattes.
The Main Players: Common Types of Milk Frothers
Milk frothers come in a few different shapes and sizes, and understanding them helps clarify where the frothing cycle comes into play.
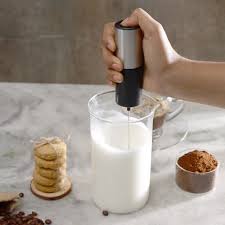
- Handheld Frothers: These are small, battery-operated whisks. They’re great for a quick froth, but they’re entirely manual. You control the time, the motion, and you have to heat your milk separately. There’s no automated “frothing cycle” here—you are the cycle!
- Espresso Machine Steam Wands: The classic barista tool. It uses high-pressure steam to simultaneously heat and texture milk. This requires skill and practice to master. Again, the “cycle” is controlled by the barista’s technique, not the machine.
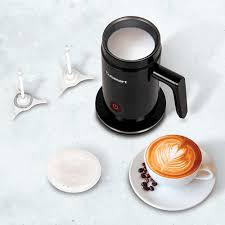
- Automatic Electric Frothers: This is where the magic happens. These countertop jugs heat and froth milk at the push of a button. They are designed around a specific what is a frothing cycle process to deliver consistent results every single time, making them perfect for home use.
|
Our Picks for the Best Milk Steamer in 2026
As an Amazon Associate, we earn from qualifying purchases.
|
||
| Num | Product | Action |
|---|---|---|
| 1 | Instant Pot Milk Frother, 4-in-1 Electric Milk Steamer, 10oz/295ml Automatic Hot and Cold Foam Maker and Milk Warmer for Latte, Cappuccinos, Macchiato, From the Makers of Instant 500W, Black |

|
| 2 | Milk Frother and Steamer, Large Capacity Detachable Electric Milk Frother, Automatic Warm and Cold Foam Maker, Hot Chocolate Maker, BPA Free, Black |
|
| 3 | Milk Frother and Steamer, Large Capacity Detachable Electric Milk Frother, Automatic Warm and Cold Foam Maker, Stainless Steel Jug, BPA Free |
|
| 4 | SIMPLETASTE Milk Frother, 4-in-1 Electric Milk Steamer, Automatic Warm and Cold Foam Maker and Milk Warmer for Latte, Cappuccinos, Macchiato |
|
| 5 | Electric Milk Frother and Steamer, 16.9oz/500ml Milk Steamer and Frother for Latte, Dishwasher Safe, BPA Free, 4 Functions, Enjoy Perfect Milk Froth in 2 Min - White |
|
| 6 | Nespresso Aeroccino 3 Milk Frother, Black, Steel |
|
| 7 | SIMPLETASTE Milk Frother, 4-in-1 Electric Milk Steamer, Automatic Warm and Cold Foam Maker and Milk Warmer for Latte, Cappuccinos, Macchiato |
|
| 8 | Dreo Milk Frother [Upgraded], All-in-1 Electric Foam Maker for Coffee, 15oz/450ml Automatic Foam Frother for Latte Art-level Microfoam, 30+ Drinks, Dishwasher Safe, Easy to Clean, LED display |
|
| 9 | Subminimal NanoFoamer Pro Gen-2 – Revolutionary Hands-Free Microfoam Milk Maker for Cafe-Quality Foam, Coffee Bar Accessories for Dairy & Plant-Based Milk, Perfect Coffee Gifts – US Plug Type |
|
| 10 | Dreo Milk Frother [Upgraded], All-in-1 Electric Foam Maker for Coffee, 15oz/450ml Automatic Foam Frother for Latte Art-level Microfoam, 30+ Drinks, Dishwasher Safe, Easy to Clean, LED display |
|
Demystifying the Frothing Cycle: A Step-by-Step Guide
Alright, let’s get down to the nitty-gritty. When you press that “start” button on your automatic frother, you’re not just turning on a motor. You’re initiating a sophisticated, multi-stage process. While it can vary slightly between brands like Nespresso, Breville, or Bodum, the fundamental frothing cycle generally follows these four key steps.
- The Heating Phase: The first thing the machine does is gently heat the milk. The base of the frothing jug contains a heating element that brings the milk up to the optimal temperature, typically between 140-155°F (60-68°C). This is the sweet spot. Any hotter, and the milk proteins start to break down, which can ruin the flavor and prevent a stable foam from forming. Any cooler, and you won’t get that rich, creamy texture.
- The Aeration (or Stretching) Phase: Simultaneously with heating, a small magnetic whisk at the bottom begins to spin rapidly. This is the crucial step where air is introduced into the milk. The whisk is designed to vortex the milk, pulling it down and folding air into it. You might hear a gentle whirring sound get slightly more intense. This is your milk being “stretched” as its volume increases with the introduction of thousands of microbubbles.
- The Texturizing (or Emulsifying) Phase: Once enough air has been incorporated, the cycle shifts focus. The whisk may slow down or change its pattern slightly. The goal now isn’t to add more air, but to break down the large bubbles and fold the newly created foam back into the milk. This process emulsifies the milk, creating a uniform, silky-smooth microfoam with a glossy, wet-paint-like appearance. This is the texture you need for pouring beautiful latte art.
- The Automatic Shut-Off: How does it know when to stop? A built-in thermostat constantly monitors the milk’s temperature. Once it reaches the pre-set perfect temperature, the heating element and the whisk automatically shut off. This prevents scalding and ensures you get consistent, perfectly heated, and textured milk every single time without having to watch over it.
A Barista’s Two Cents: As professional barista Maria Chen puts it, “The beauty of an automatic frothing cycle is its consistency. At the cafe, I rely on touch and sound to know when the milk is ready. At home, a good machine’s frothing cycle does that for me. It takes the guesswork out and lets anyone feel like a pro.”
Pro Tips for a Flawless Frothing Cycle
Understanding the cycle is half the battle. Now, let’s talk about how you can help your machine do its best work.
- Choose the Right Milk: The protein and fat content in milk is what creates the foam. For the richest, creamiest foam, whole dairy milk is the undisputed champion. Reduced-fat (2%) also works very well. Skim milk creates a lot of stiff, airy foam, but it lacks the velvety texture.
- What About Non-Dairy Milk? You can absolutely use a frothing cycle with plant-based milks, but results will vary! “Barista blend” versions of oat, soy, and almond milk are your best bet. They have added proteins and emulsifiers designed specifically to create stable microfoam. Regular almond or rice milk may not froth well.
- Start with Cold Milk: Always, always start with fresh, cold milk straight from the fridge. Warm milk won’t froth. The proteins need to go through the full heating range of the frothing cycle to texturize properly.
- Don’t Overfill: Pay attention to the max and min fill lines inside your frother’s jug. Overfilling can cause spills and prevent the milk from circulating properly, leading to poor foam.
- Use the Right Whisk: Most frothers come with two attachments: a frothing whisk (with a spring-like coil) and a heating whisk (just the paddle). Make sure you’re using the frothing whisk for lattes and cappuccinos.
Keeping it Clean: How to Maintain Your Milk Frother
A clean machine is a happy machine. Milk residue can build up and affect the frothing cycle’s performance and, more importantly, the taste of your drink.
- Rinse Immediately: As soon as you pour your frothed milk, rinse the jug with warm water. Don’t let the milk dry inside.
- Gentle Soap and Water: Use a soft sponge or cloth with a little dish soap to wipe the interior. Most frothing jugs have a non-stick coating, so avoid abrasive scrubbers.
- Clean the Whisk: The little magnetic whisk can be removed. Make sure you clean it thoroughly, as tiny milk solids can get trapped in the coil.
- Wipe the Base: Never submerge the electrical base in water. Simply wipe it down with a damp cloth if needed.
Final Thoughts on Choosing a Frother
Now that you know what is a frothing cycle, you can be a smarter shopper. When looking for an automatic frother, consider models that offer different settings. Some advanced frothers have cycles for:
- Hot, dense foam (for cappuccinos)
- Hot, silky foam (for lattes)
- Hot milk (for hot chocolate, no foam)
- Cold foam (for iced coffees and cocktails)
These options simply adjust the time, speed, and temperature of the frothing cycle to give you more control over your final drink.
Frequently Asked Questions (FAQ)
Q: Can I control the frothing cycle on my machine?
A: On most basic models, the frothing cycle is fully automatic and cannot be adjusted. However, more premium frothers offer different settings (e.g., “Latte,” “Cappuccino,” “Cold Foam”) which are essentially different pre-programmed cycles you can choose from to match your desired drink.
Q: Why did my milk suddenly stop frothing correctly during the cycle?
A: The most common culprits are using milk that isn’t fresh or cold enough, or milk residue built up on the whisk or inside the jug. Give your frother a thorough cleaning and try again with fresh, cold milk. The type of milk (especially non-dairy) can also be a factor.
Q: What’s the difference between a frothing cycle for a latte and a cappuccino?
A: A cappuccino cycle is designed to incorporate more air, creating a stiffer, thicker layer of foam. A latte cycle focuses more on the texturizing phase to create a silkier microfoam that integrates more smoothly with the espresso, with just a thin layer of foam on top.
Q: Does the frothing cycle work well with non-dairy milks?
A: Yes, but with varying success. For best results, always use a “barista blend” of your preferred non-dairy milk (oat milk is a popular favorite for its creamy texture). These are formulated with extra proteins or stabilizers that help them perform well in a frothing cycle.
Q: How long should a typical frothing cycle take?
A: A standard frothing cycle in an automatic electric frother usually takes between 60 and 90 seconds. This is just enough time to heat the milk to the perfect temperature and create a stable, well-textured foam without you having to do a thing.
So there you have it. The frothing cycle is no longer a mystery; it’s your personal, automated barista working diligently to perfect your morning cup. By understanding what is a frothing cycle and how to get the most out of it, you’re not just making coffee—you’re crafting an experience. You’re bringing the art and soul of the coffee shop right into your kitchen, one perfectly frothed mug at a time.