Let’s be honest, that moment when you pour perfectly frothed, velvety milk into your morning coffee is pure magic. It’s a little daily luxury that turns a simple cup of joe into a café-worthy experience. But what comes after the bliss? The cleanup. And if you’ve ever peered at the underside of your frother’s lid, you know it can get a little… crusty. So, you’re asking, What Is The Best Way To Clean The Lid of your milk frother? You’ve come to the right place. It’s simpler than you think, and getting it right is the secret to consistently delicious drinks and a machine that lasts.
That little lid does more than just prevent splashes; it’s often a key part of the frothing mechanism, housing a spinning whisk or directing the flow of steam and milk. When milk residue builds up, it doesn’t just look gross—it can affect performance and, worse, the taste of your next beautiful latte. Let’s dive into making that lid (and the rest of your frother) spotlessly clean.
First, What Exactly is a Milk Steamer Frother?
Before we get into the nitty-gritty of cleaning, let’s have a quick recap. A Milk Steamer Frother is a kitchen gadget designed to do two things beautifully: heat milk to the optimal temperature and aerate it to create foam (or “microfoam” if you’re getting fancy). It’s your ticket to making cappuccinos, lattes, macchiatos, and even gourmet hot chocolates right in your own kitchen, without the coffee shop price tag.
Think of it as your personal barista. It takes cold, flat milk and transforms it into the warm, creamy, cloud-like topping that defines so many beloved coffee drinks.
The Main Types of Frothers You’ll Encounter
Understanding your frother type is key, as the lid and cleaning process can vary slightly. They generally fall into three camps:
- Handheld Frothers: These are battery-operated wands with a small whisk on the end. They don’t have a “lid” in the traditional sense, so their cleaning is super straightforward—just rinse the whisk.
- Automatic Electric Frothers: This is the most popular type and the one we’ll focus on. It’s a standalone jug or carafe, usually with a non-stick interior, that heats and froths milk at the push of a button. The lid is a crucial, multi-part component here.
- Steam Wands (on Espresso Machines): These are the pro-level tools you see in coffee shops. They use high-pressure steam to texture milk. While they don’t have a lid, keeping the wand itself clean is a discipline all its own.
|
Our Picks for the Best Milk Steamer in 2025
As an Amazon Associate, we earn from qualifying purchases.
|
||
| Num | Product | Action |
|---|---|---|
| 1 | Instant Pot Milk Frother, 4-in-1 Electric Milk Steamer, 10oz/295ml Automatic Hot and Cold Foam Maker and Milk Warmer for Latte, Cappuccinos, Macchiato, From the Makers of Instant 500W, Black |

|
| 2 | Milk Frother and Steamer, Large Capacity Detachable Electric Milk Frother, Automatic Warm and Cold Foam Maker, Hot Chocolate Maker, BPA Free, Black |
|
| 3 | Dreo Milk Frother [Upgraded], All-in-1 Electric Foam Maker for Coffee, 15oz/450ml Automatic Foam Frother for Latte Art-level Microfoam, 30+ Drinks, Dishwasher Safe, Easy to Clean, LED display |
|
| 4 | Milk Frother and Steamer, Large Capacity Detachable Electric Milk Frother, Automatic Warm and Cold Foam Maker, Stainless Steel Jug, BPA Free |
|
| 5 | Nespresso Aeroccino 3 Milk Frother, Black, Steel |
|
| 6 | Dreo Milk Frother [Upgraded], All-in-1 Electric Foam Maker for Coffee, 15oz/450ml Automatic Foam Frother for Latte Art-level Microfoam, 30+ Drinks, Dishwasher Safe, Easy to Clean, LED display |
|
| 7 | SIMPLETASTE Milk Frother, 4-in-1 Electric Milk Steamer, Automatic Warm and Cold Foam Maker and Milk Warmer for Latte, Cappuccinos, Macchiato |
|
| 8 | SIMPLETASTE Milk Frother, 4-in-1 Electric Milk Steamer, Automatic Warm and Cold Foam Maker and Milk Warmer for Latte, Cappuccinos, Macchiato |
|
| 9 | Subminimal NanoFoamer Pro Gen-2 – Revolutionary Hands-Free Microfoam Milk Maker for Cafe-Quality Foam, Coffee Bar Accessories for Dairy & Plant-Based Milk, Perfect Coffee Gifts – US Plug Type |
|
| 10 | Electric Milk Frother and Steamer, 16.9oz/500ml Milk Steamer and Frother for Latte, Dishwasher Safe, BPA Free, 4 Functions, Enjoy Perfect Milk Froth in 2 Min - White |
|
The Definitive Guide: What is the Best Way to Clean the Lid
Okay, let’s get to the main event. A clean frother starts with a clean lid. Dried milk protein is surprisingly stubborn, so the key is consistency. Don’t let it sit!
“The golden rule of any dairy equipment, from a commercial espresso machine to a home frother, is to clean it immediately after use. Milk proteins begin to set and bake onto hot surfaces almost instantly. A quick rinse now saves you a 10-minute scrub later.” – Isabella Rossi, veteran barista and coffee consultant.
Here’s a simple, effective routine you can follow.
Your Daily Cleaning Routine (The 60-Second Refresh)
This is what you should do after every single use. No exceptions!
- Unplug and Disassemble: First, safety. Unplug the unit. Carefully remove the lid from the frother jug. Most lids have a small magnetic whisk and a silicone sealing ring—gently pull these off the lid.
- Immediate Rinse: Take all three parts (the plastic lid, the whisk, and the silicone ring) to the sink and rinse them thoroughly under warm running water. This will wash away the majority of the fresh milk residue before it has a chance to dry.
- A Gentle Wipe: Use a soft, non-abrasive sponge or cloth with a tiny drop of dish soap to gently wash each part. Pay special attention to the nooks and crannies on the underside of the lid where the whisk attaches.
- Rinse Again: Rinse all the soap off completely. You don’t want your next flat white tasting of lemon-scented dish soap.
- Air Dry: Place the parts on a drying rack or a clean kitchen towel and let them air dry completely before reassembling. This prevents moisture from getting trapped, which can lead to musty smells.
This whole process takes less than a minute but makes a world of difference. It’s the absolute best way to clean the lid on a daily basis.
The Weekly Deep Clean (For a Total Reset)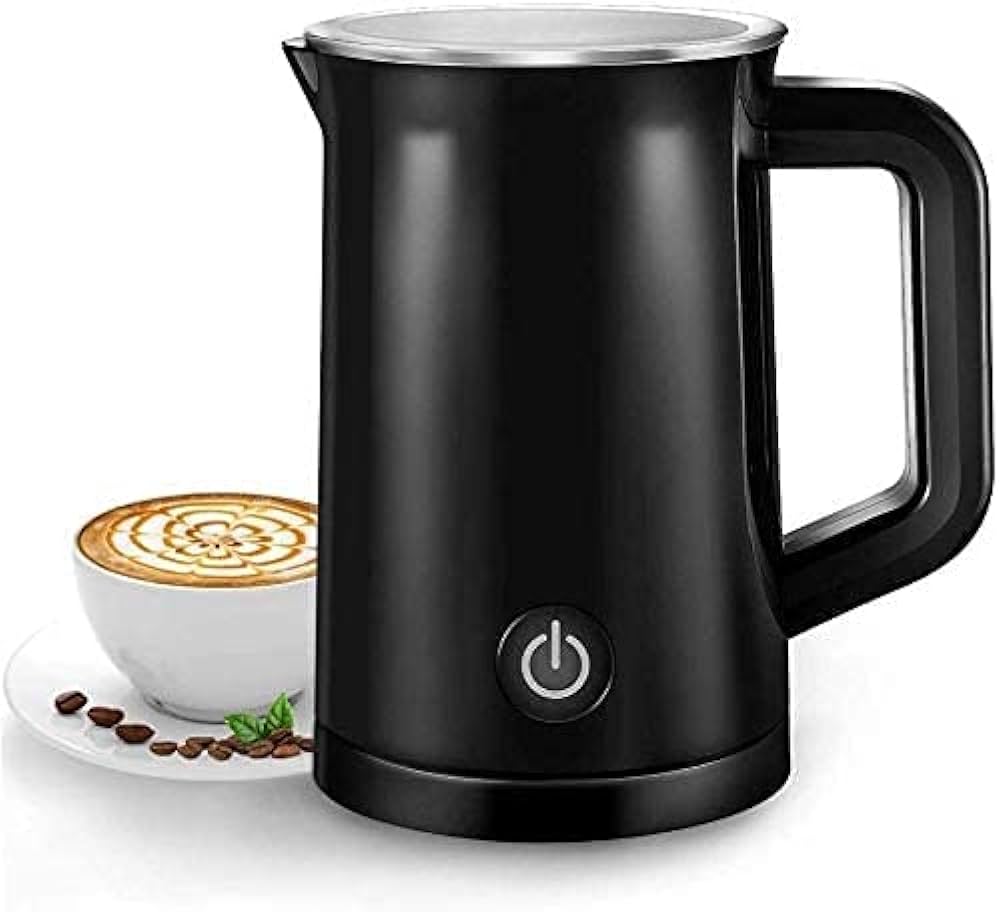
Even with diligent daily cleaning, you might notice a slight film or a faint milky smell over time. A weekly deep clean will keep your frother in prime condition.
- Disassemble the Lid: Just like your daily clean, take the lid, whisk, and silicone ring apart.
- Create a Soaking Solution: Fill a bowl with warm water and a splash of white vinegar or a tablespoon of baking soda. Both are excellent for breaking down stubborn milk fats and proteins and neutralizing odors.
- Soak it Good: Submerge all the lid components in the solution for about 15-20 minutes. This will loosen any hardened, baked-on residue that a quick rinse might miss.
- Gentle Scrub: After soaking, use a soft brush (an old, clean toothbrush is perfect for this) to gently scrub all the crevices. Get into the groove where the silicone ring sits and around the magnetic post for the whisk.
- Thorough Rinse and Dry: Rinse everything under clean water to remove all the vinegar or baking soda residue. Let it air dry completely.
Pro Tips for Frothing Perfection
A clean machine is step one. But if you want to elevate your game, here are a few secrets from the pros.
- Milk Matters: Fresher, colder milk always froths best. Whole milk creates a rich, creamy foam due to its higher fat content. Skim milk creates a larger volume of lighter, airier foam. Oat milk (barista blend) is the king of plant-based alternatives for frothing.
- Mind the Temperature: Never reheat milk that has already been frothed. For the best results, always start with milk straight from the fridge. The frother is designed to heat it to the perfect temperature (usually around 150°F or 65°C), which is hot enough to be pleasant but not so hot that it scalds the milk and ruins the flavor.
- Don’t Overfill: Pay close attention to the MAX fill lines inside your frother jug. There are usually two: one for frothing (lower) and one for just heating (higher). Overfilling is the number one cause of messy overflows.
Don’t Forget the Rest of the Frother!
Cleaning the lid is crucial, but it’s only part of the equation.
- The Jug/Carafe: Immediately after pouring out your frothed milk, fill the jug with a little water and a drop of soap. Give it a quick swirl and wash with a soft sponge. Never use a metal scourer, as it will destroy the non-stick coating.
- The Base: The base contains all the electronics. Never submerge it in water. Simply wipe it down with a damp cloth if any milk has spilled on it.
What to Consider When Buying a Milk Frother
If you’re in the market for a new frother, or your old one is just too much of a pain to clean, here’s what to look for:
| Feature | Why It’s Important for Easy Cleaning |
|---|---|
| Dishwasher-Safe Parts | The ultimate convenience. Lids, whisks, and sometimes even the jug can be popped in the dishwasher. Always check the manual first! |
| Non-Stick Interior | A high-quality non-stick coating (like Teflon or ceramic) makes wiping out milk residue a breeze. |
| Removable Silicone Ring | This allows you to get into the groove of the lid for a truly thorough clean, preventing buildup and smells. |
| Simple Lid Design | The fewer tiny, complex parts on the lid, the easier it is to clean. Look for smooth surfaces and minimal crevices. |
Frequently Asked Questions (FAQ)
Q: Can I put my milk frother lid in the dishwasher?
A: It depends entirely on the model. Many modern frothers, like those from Nespresso or Breville, have dishwasher-safe lids, whisks, and rings. However, you should always check your user manual first to be certain. When in doubt, hand wash.
Q: What is that burnt milk smell and how do I get rid of it?
A: That smell is from milk solids scorching onto the bottom of the frother jug. The best way to prevent it is to clean it immediately after every use. To get rid of a stubborn smell, soak the jug and lid parts in a warm water and white vinegar solution for 30 minutes, then wash as usual.
Q: How often should I deep clean my frother lid?
A: A quick rinse and wipe after every use is mandatory. A more thorough deep clean, involving a soak, is recommended at least once a week if you use your frother daily. If you use it less frequently, a deep clean every 2-3 weeks should suffice.
Q: My milk isn’t frothing as well as it used to. Is cleaning the problem?
A: It very well could be! A tiny bit of milk or oil residue on the whisk or inside the jug can completely ruin the frothing process. Give the entire unit, especially the whisk, a deep clean. If that doesn’t work, try using fresher, colder milk.
Q: Is it safe to use vinegar to clean my milk frother?
A: Yes, diluted white vinegar is an excellent and safe cleaning agent for breaking down milk residue. Just be sure to rinse it very thoroughly afterward to ensure no vinegary taste lingers in your next coffee.
The Final Sip
Mastering your at-home coffee game is a journey of small, satisfying rituals. And believe it or not, the quick, mindful act of cleaning your equipment is part of that. Knowing what is the best way to clean the lid and the rest of your frother isn’t a chore; it’s the simple secret to guaranteeing every single cup of coffee you make is as delicious as the last. It protects your investment, ensures the purest taste, and keeps that little bit of morning magic alive and well. Now, go enjoy that perfectly crafted cappuccino—you’ve earned it.