Let’s be honest, we’ve all been there. You’re standing in your favorite coffee shop, mesmerized as the barista effortlessly pours a swan or a perfect heart onto your latte. You think, “I can do that!” You get home, fire up your espresso machine, froth some milk… and end up with a Rorschach test in a cup. Sound familiar? Don’t worry, you’re not alone. The secret isn’t just in the flick of the wrist; it’s a beautiful dance between perfectly textured milk and a confident pour. So, What Is The Best Way To Pour Milk For Latte Art? It’s a combination of technique, timing, and a little bit of science, and we’re going to break it all down for you.
Think of us as your personal coffee coach. We’re here to turn those mysterious blobs into beautiful, intentional designs, elevating your home coffee game from simple to spectacular.
First Things First: What is a Milk Steamer and Why Do You Need One?
Before we dive into pouring, let’s talk about the tool that makes it all possible. A milk steamer, or frother, is the magic wand of the coffee world. Its job is to heat milk and inject it with air, creating a velvety, smooth texture known as microfoam. This isn’t the stiff, bubbly foam you see on an old-school cappuccino; microfoam is silky, with bubbles so tiny they’re almost invisible.
Why is microfoam so important? Because it integrates perfectly with the espresso, creating a rich, creamy beverage. It also has the perfect consistency to be poured into intricate designs. Without a quality milk steamer, achieving the right texture for latte art is nearly impossible.
What Are the Main Types of Milk Steamers?
You’ve got a few options when it comes to creating that luscious microfoam. Each has its pros and cons, and the right one for you depends on your budget, counter space, and how deep you want to dive into the coffee rabbit hole.
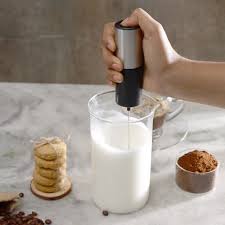
Handheld Frothers
These are battery-operated whisks. They’re super affordable and great for beginners who just want a bit of foam. However, they don’t heat the milk and struggle to create true microfoam, making them less ideal for serious latte art.
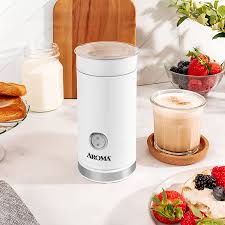
Automatic Milk Frothers
These are countertop electric jugs that heat and froth milk at the push of a button. They are incredibly convenient and consistent. Many modern ones, like the Nespresso Aeroccino, have settings that can produce a decent-quality foam suitable for basic latte art. They are a fantastic middle-ground for convenience and quality.
Steam Wands
This is the professional’s choice, typically found integrated into espresso machines. A steam wand uses high-pressure steam to both heat the milk and create the perfect microfoam. It offers the most control but also has the steepest learning curve. Mastering a steam wand is the key to unlocking cafe-quality latte art at home.
|
Our Picks for the Best Milk Steamer in 2025
As an Amazon Associate, we earn from qualifying purchases.
|
||
| Num | Product | Action |
|---|---|---|
| 1 | SIMPLETASTE Milk Frother, 4-in-1 Electric Milk Steamer, Automatic Warm and Cold Foam Maker and Milk Warmer for Latte, Cappuccinos, Macchiato |

|
| 2 | Milk Frother and Steamer, Large Capacity Detachable Electric Milk Frother, Automatic Warm and Cold Foam Maker, Stainless Steel Jug, BPA Free |
|
| 3 | Subminimal NanoFoamer Pro Gen-2 – Revolutionary Hands-Free Microfoam Milk Maker for Cafe-Quality Foam, Coffee Bar Accessories for Dairy & Plant-Based Milk, Perfect Coffee Gifts – US Plug Type |
|
| 4 | Dreo Milk Frother [Upgraded], All-in-1 Electric Foam Maker for Coffee, 15oz/450ml Automatic Foam Frother for Latte Art-level Microfoam, 30+ Drinks, Dishwasher Safe, Easy to Clean, LED display |
|
| 5 | Nespresso Aeroccino 3 Milk Frother, Black, Steel |
|
| 6 | Instant Pot Milk Frother, 4-in-1 Electric Milk Steamer, 10oz/295ml Automatic Hot and Cold Foam Maker and Milk Warmer for Latte, Cappuccinos, Macchiato, From the Makers of Instant 500W, Black |
|
| 7 | Dreo Milk Frother [Upgraded], All-in-1 Electric Foam Maker for Coffee, 15oz/450ml Automatic Foam Frother for Latte Art-level Microfoam, 30+ Drinks, Dishwasher Safe, Easy to Clean, LED display |
|
| 8 | SIMPLETASTE Milk Frother, 4-in-1 Electric Milk Steamer, Automatic Warm and Cold Foam Maker and Milk Warmer for Latte, Cappuccinos, Macchiato |
|
| 9 | Electric Milk Frother and Steamer, 16.9oz/500ml Milk Steamer and Frother for Latte, Dishwasher Safe, BPA Free, 4 Functions, Enjoy Perfect Milk Froth in 2 Min - White |
|
| 10 | Milk Frother and Steamer, Large Capacity Detachable Electric Milk Frother, Automatic Warm and Cold Foam Maker, Hot Chocolate Maker, BPA Free, Black |
|
The Ultimate Guide: What Is the Best Way to Pour Milk for Latte Art?
Alright, your espresso is pulled, your milk is steamed to a glossy, wet-paint-like perfection. It’s showtime. Grab your pitcher and your cup. Let’s do this.
We’ll break this down into a step-by-step process. Remember, practice makes perfect! Your first few might not be masterpieces, and that’s okay.
- Groom Your Milk: As soon as you finish steaming, the milk will start to separate. Give the pitcher a firm tap or two on the counter to pop any large, visible bubbles. Then, swirl the milk in the pitcher for about 10-15 seconds. This polishes the milk, making it smooth and glossy. This step is non-negotiable!
- Angle Your Cup: Hold your mug, with its beautiful shot of espresso and crema, in your non-dominant hand. Tilt it towards you at about a 45-degree angle. This creates a deeper pool of espresso for the milk to fall into, which is crucial for the next step.
- The High Pour (Setting the Canvas): Begin pouring from a height of about 4-6 inches above the cup. Pour a thin, steady stream directly into the center of the deepest part of the espresso. The goal here is for the milk to dive under the crema, mixing with the espresso below without marking the surface. Fill the cup about halfway to two-thirds full this way. Think of this as priming your canvas.
- The Low Pour (Drawing the Design): This is where the magic happens. Bring the spout of your pitcher as close as you can to the surface of the crema—I mean, almost touching. As you lower the pitcher, increase your pour rate slightly. This change in proximity and speed will cause the white microfoam to sit on top of the crema, creating your design.
- Create Your Shape:
- For a Heart: Continue pouring into the center. As the cup fills and becomes level, a white dot will form and expand. When it’s the size you want, lift the pitcher slightly and pour through the center of the dot to the edge of the cup. This “pull-through” motion will draw the dot into a heart shape.
- For a Rosetta: Once you start your low pour, gently wiggle your wrist from side to side as you slowly move the pitcher backward across the cup. This creates the stacked, leafy pattern. To finish, lift and pull through just like the heart.
- Level and Serve: As you finish your design, level the cup out and serve with a proud smile. You did it!
Pro Tips for Picture-Perfect Pours
Getting the hang of the pour is one thing, but the pros have a few extra tricks up their sleeves.
What’s the Best Milk for Latte Art?
The protein and fat content in milk are what create stable, creamy foam.
| Milk Type | Frothing Potential | Flavor Profile | Pro Tip |
|---|---|---|---|
| Whole Milk | Excellent | Rich, creamy, sweet | The gold standard. Easiest to learn with due to high fat and protein. |
| Skim Milk | Good | Lacks creaminess | Creates a very stiff, dry foam. Not ideal for the silky texture needed for art. |
| Oat Milk | Very Good | Naturally sweet, creamy | The king of non-dairy options. Choose a “barista blend” for best results. |
| Almond Milk | Fair | Can be thin, nutty | Tends to separate quickly. Look for barista blends which contain stabilizers. |
| Soy Milk | Good | Distinct flavor | Froths well, but can sometimes curdle in acidic coffee. Pour carefully. |
How Important is Milk Temperature?
It’s incredibly important. Start with very cold milk, straight from the fridge. The ideal final temperature after steaming is between 140-155°F (60-68°C). If you go too hot, you’ll scald the milk, destroying its natural sweetness and ruining the texture. A barista thermometer can be a game-changer when you’re starting out.
A great piece of advice comes from professional barista Isabella Rossi: “Stop steaming when the outside of the pitcher is just a little too hot to hold comfortably. By the time you set it down and wipe the wand, it will have reached the perfect temperature. It’s a tactile skill you develop over time.”
Does the Pitcher Matter?
Yes, it does! A good frothing pitcher should be made of stainless steel (so you can feel the temperature) and have a defined, sharp spout. The spout is like your pen nib—it gives you the control needed for detailed designs.
Keeping Your Milk Steamer in Top Shape
A clean machine is a happy machine. Milk residue can build up quickly, affecting performance and flavor.
- Steam Wands: Purge the wand (run the steam for a second) before and after every use. Wipe it down with a dedicated damp cloth immediately after steaming.
- Automatic Frothers: Wash the jug after every single use. Most are non-stick, so a simple rinse and wipe with a soft cloth is all that’s needed. Don’t use abrasive sponges.
- Handheld Frothers: Simply rinse the whisk head under hot water after use.
What Should I Look For When Buying a Milk Steamer?
Ready to invest in your home cafe? Here’s a quick checklist:
- Your Drink of Choice: Do you just want foam, or are you dedicated to mastering latte art? This will determine if you need a basic frother or a machine with a quality steam wand.
- Convenience vs. Control: Automatic frothers offer push-button simplicity. Steam wands offer ultimate control but require practice.
- Budget: Prices range from under $20 for a handheld whisk to hundreds or thousands for an espresso machine with an integrated steam wand.
- Cleaning: How much time are you willing to spend on cleanup? Look for dishwasher-safe parts or simple designs if you’re short on time.
Frequently Asked Questions
Why is my milk foam too bubbly for latte art?
This usually means you’ve incorporated too much air at the beginning of the steaming process, or you haven’t “groomed” the milk by tapping and swirling the pitcher. Aim for a gentle “hissing” sound when steaming, not a loud “screaming” one.
Can you make latte art with non-dairy milk?
Absolutely! The best option is a barista-series oat milk, as it’s formulated to steam and pour almost exactly like whole milk. Barista blends of soy and almond milk also work well.
What’s the difference between latte foam and cappuccino foam?
Latte foam is “wet” microfoam—silky, pourable, and integrated with the milk. Cappuccino foam is “dry”—stiffer, lighter, and designed to sit on top of the drink in a thick layer. You incorporate more air for a longer time to create cappuccino foam.
Do I really need a special pitcher with a spout?
For serious latte art, yes. The defined spout is what gives you the precision to “draw” on the crema. Trying to pour from a regular mug or cup will result in blobs, not hearts.
How long should it take to steam milk?
For a single latte (about 6-8 oz of milk), it should take about 20-40 seconds with a good steam wand. The goal is to get the texture and temperature right simultaneously. If it’s taking much longer, your machine may lack steam power.
Your Home Barista Journey Starts Now
Understanding what is the best way to pour milk for latte art is about transforming a daily routine into a moment of creativity. It’s a skill that combines art and science, and while it takes practice, the reward is immense. Every cup is a chance to create something beautiful, to enjoy a cafe-quality experience without leaving your home, and to share a little bit of joy. So grab your pitcher, steam with confidence, and start pouring. You’ve got this.