As an admin of milksteamerfrother.com and a technician with over a decade of experience, I’ve seen countless discussions about achieving that perfect, creamy milk froth. It’s a critical component of many beloved coffee and tea beverages, transforming a simple drink into an artisanal creation. But what truly makes milk froth, and how do different milk types, especially whole milk and skim milk, impact the final result? The answer lies in a fascinating interplay of dairy science and technique, and understanding it is key to elevating your home barista game.
The Science of Silky Smoothness: What Makes Milk Froth?
At its heart, milk frothing is about introducing air into milk to create a stable foam, and three main components of milk are at play: proteins, fats, and lactose (milk sugar). Proteins, specifically whey and casein, are the unsung heroes of foam creation. When milk is heated and aerated, these proteins unfold and rearrange themselves around tiny air bubbles, forming a stable network that gives foam its structure. Think of them as tiny architects building a resilient framework for your froth.
Fats, on the other hand, contribute significantly to the texture and mouthfeel of the foam. While proteins are busy building the walls, fat globules, when heated, break down and can also surround air pockets, contributing to the foam’s stability and imparting a rich, creamy consistency. Lactose, or milk sugar, doesn’t directly create foam, but it influences the sweetness of the milk, which becomes more pronounced when heated.
Temperature is another critical factor. Proteins are most stable and effective at forming foam within a specific range, typically around 140°F (60°C). Overheating milk can cause proteins to denature excessively, leading to a breakdown of the foam’s structure and an undesirable scalded taste.
Whole Milk vs. Skim Milk: A Frothing Showdown
The fat content is the primary differentiator between various milk types when it comes to frothing. Whole milk, with its higher fat content, behaves quite differently from fat-free skim milk, leading to distinct foam characteristics.
Whole Milk: The Velvety Champion
|
Our Picks for the Best Milk steamer in 2026
As an Amazon Associate I earn from qualifying purchases.
|
||
| Num | Product | Action |
|---|---|---|
| 1 | SIMPLETASTE Milk Frother, 4-in-1 Electric Milk Steamer, Automatic Warm and Cold Foam Maker and Milk Warmer for Latte, Cappuccinos, Macchiato |

|
| 2 | Large Electric Milk Frother and Steamer, 16.9oz/500ml Milk Steamer and Frother for Latte or Hot Chocolate, Dishwasher Safe, 6 Functions, Enjoy Perfect Milk Froth in 2 Min (White-Glass) |
|
| 3 | SIMPLETASTE Milk Frother, 4-in-1 Electric Milk Frother and Steamer, Automatic Warm and Cold Foam Maker and Milk Warmer for Latte, Cappuccinos, Dark Blue |
|
| 4 | Electric Milk Frother and Steamer, 16.9oz/500ml Milk Steamer and Frother for Latte, Dishwasher Safe, BPA Free, 4 Functions, Enjoy Perfect Milk Froth in 2 Min |
|
| 5 | Milk Frother and Steamer, Large Capacity & Detachable Electric Milk Frother, Automatic Warm and Cold Foam Maker, Hot Chocolate Maker, Stainless Steel Jug, 30.44Oz./900ML |
|
| 6 | SIMPLETASTE Milk Frother, 4-in-1 Electric Milk Steamer, Automatic Warm and Cold Foam Maker and Milk Warmer for Latte, Cappuccinos, Macchiato |
|
| 7 | Milk Frother, 4-in-1 Milk Frother and Steamer, 10.6oz Electric Milk Steamer, Automatic Cold and Hot Foam maker for Lattes, Cappuccinos, Ceramic Lining Interior (Polished) |
|
| 8 | HAUSHOF Milk Frother, 4-in-1 Electric Milk Frother and Steamer, Large Capacity, Hot Chocolate Maker, Automatic Warm and Cold Foam Maker for Coffee, Latte, Macchiato, Cappuccino |
|
| 9 | Milk Frother, 4-in-1 Electric Milk Steamer, 350ml/11.8oz Automatic Frother Machine for Coffee, Warm and Cold Foam, Temperature Control for Latte, Cappuccino, Hot Chocolate |
|
| 10 |
|
|
Whole milk typically contains around 3.5-4% fat. This higher fat content is what gives whole milk its rich flavor and contributes to a luxurious, velvety, and creamy texture when frothed. The fats help create a dense microfoam with very small, uniform bubbles, often considered ideal for latte art because of its smooth, pourable consistency. [cite: 2 search 2, 5 search 2] The foam from whole milk tends to be quite stable, holding its shape well without quickly dissipating. While it might produce slightly less overall volume than skim milk, its superior texture and stability are often preferred by baristas. Many find whole milk to be more forgiving for beginners attempting latte art, as its body makes it easier to control. [cite: 1 search 2]
 Velvety microfoam from whole milk in a latte, ideal for intricate latte art designs and rich creamy texture.
Skim Milk: The Voluminous, Airy Contender
Skim milk, being fat-free, offers a contrasting frothing experience. With virtually no fat to interfere with protein activity, skim milk tends to produce a significantly larger volume of foam. This foam is often described as airy, stiff, and having larger bubbles. [cite: 2, 5 search 2] However, this impressive volume often comes at the cost of stability and texture. Skim milk foam can be less stable, prone to separating quickly, and can feel dry or stiff in the mouth. This makes it challenging for delicate latte art, as the foam might “plop” rather than flow smoothly into patterns. While it can be frothed effectively, it often requires a bit more air incorporation and a more nuanced technique to achieve desirable results. [cite: 1 search 2]
2% Milk & Other Dairy Options: Finding the Middle Ground
For those seeking a balance between the richness of whole milk and the lightness of skim, 2% milk offers a viable compromise. With its trimmed fat content (2%), it produces a foam that is slightly drier than whole milk but still offers a similar creaminess. [cite: 2 search 2] It can be an excellent choice for lattes and cappuccinos that you want to be a bit lighter but still feature a good, resilient froth. Lactose-free dairy milk is also available and generally froths similarly to its regular counterparts if the fat and protein content is consistent. [cite: 4 search 2]
Comparing Dairy Milk Types for Frothing
| Feature | Whole Milk (approx. 3.5-4% fat) | Skim Milk (0% fat) | 2% Milk (2% fat) |
|---|---|---|---|
| Foam Volume | Moderate | High | Moderate to High |
| Foam Stability | High, very stable | Lower, can be dry and separate | Good, generally stable |
| Texture | Velvety, creamy, microfoam | Airy, stiff, larger bubbles | Lighter creaminess, slight dryness |
| Best Use | Latte art, rich cappuccinos | Voluminous, lighter foam | Everyday lattes & cappuccinos |
| Flavor | Rich, full-bodied | Neutral, allows coffee to shine | Balanced, subtle sweetness |
Beyond Dairy: Frothing Alternative Milks
The world of frothing extends beyond cow’s milk, with many excellent non-dairy alternatives available. These milks have their own unique properties and require specific techniques to achieve the best foam.
Oat Milk has emerged as a favorite among non-dairy options, particularly barista blends. Its consistency closely resembles that of whole dairy milk, allowing it to produce creamy, stable foam suitable for latte art. [cite: 2 search 2] Barista editions are formulated with stabilizers (like rapeseed oil) to improve frothing performance and maintain a smooth texture. [cite: 4 search 2]
Almond Milk offers a nutty flavor profile. While it may not froth as voluminously as dairy or oat milk, some barista blends can produce a lovely, delicate, and long-lasting foam. It tends to pull in more air initially, so a slower air injection might be needed to avoid large bubbles. [cite: 3 search 2]
Soy Milk is another popular choice, though it can react poorly with highly acidic coffees, potentially leading to curdling. It generally requires less heat than cow’s milk (around 130-140°F or 55-60°C) and less air to achieve a good foam. [cite: 3 search 2]
When frothing any alternative milk, opting for “barista” versions is often recommended, as they are specifically designed to perform better under heat and aeration.
Achieving the Perfect Froth: Expert Tips
No matter which milk you choose, mastering the art of frothing requires attention to detail and consistent practice. Here are some essential tips to help you achieve café-quality foam at home:
- Start Cold: Always begin with fresh, very cold milk. Cold milk gives you more time to introduce air and develop the foam before it gets too hot and the proteins denature. [cite: 2 search 3, 1 search 4]
- Purge the Steam Wand: Before steaming, always purge your machine’s steam wand for a few seconds. This removes any condensed water and ensures you’re only introducing pure steam into your milk, preventing a watery foam. [cite: 1 search 4, 5 search 4]
- Use the Right Amount of Milk: Fill your frothing pitcher about one-third to halfway. This allows enough room for the milk to expand without overflowing and gives you space to create a proper vortex. [cite: 1 search 4, 4 search 4]
- Position and Vortex: Submerge the tip of the steam wand just below the surface of the milk, slightly off-center, at about a 45-degree angle. This creates a “vortex” or whirlpool effect, which is crucial for incorporating air evenly and breaking down larger bubbles into a fine microfoam. [cite: 1 search 4, 5 search 4]
- Stretch and Texture: First, introduce air (the “stretching” phase) by keeping the wand tip near the surface until the milk volume increases. Then, lower the pitcher slightly to submerge the wand tip deeper, allowing the steam to circulate and “texture” the milk, integrating the air and refining the microfoam.
- Monitor Temperature: Aim for an optimal temperature of around 140-150°F (60-65°C). You can often judge this by touch; the pitcher will become too hot to hold comfortably. Overheating can lead to a burnt taste and a fragile foam. [cite: 1 search 4]
- Clean Immediately: After frothing, always wipe down your steam wand immediately with a damp cloth and purge it briefly. This prevents milk residue from drying and clogging the wand, ensuring hygiene and longevity. [cite: 2 search 3]
- Manual Frothing: If you don’t have an espresso machine, stovetop whisking, using a French press, or the “mason jar method” (shaking heated milk in a sealed jar) can also produce good foam. For the mason jar method, lower-fat milks like skim or 2% often yield the best results. [cite: 2 search 3, 3 search 3]
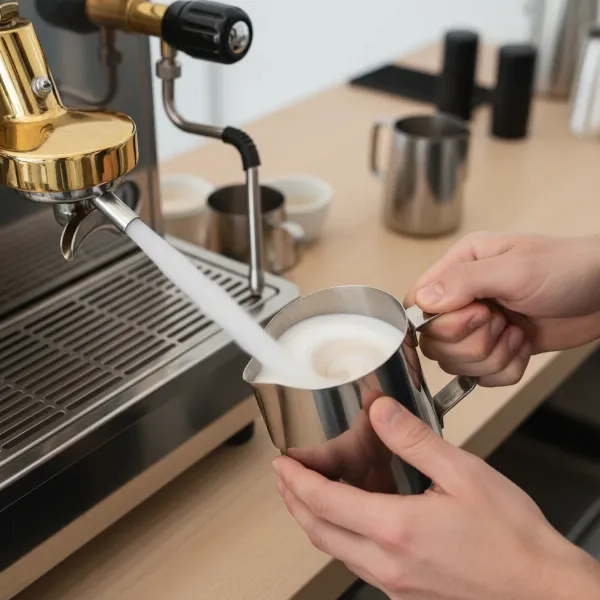 Barista steaming milk with an espresso machine's steam wand, demonstrating proper frothing technique.
Common Frothing Challenges and How to Fix Them
Even experienced baristas encounter frothing hiccups. Don’t get discouraged if your foam isn’t perfect every time. Understanding common issues can help you troubleshoot and improve.
- Too Many Large Bubbles (Dish Soap Foam): This often happens when too much air is incorporated too quickly or the wand is not positioned correctly to create a vortex. Focus on keeping the steam wand just barely at the surface during the stretching phase, listening for a gentle “kissing” sound, not a loud ripping sound. Ensure a strong whirlpool action to integrate those larger bubbles.
- Foam Disappearing Quickly: This can be a sign of insufficient protein structure or overheating. Ensure your milk is cold to start and avoid exceeding the optimal temperature. If using a low-fat milk, remember it naturally has less stability.
- Milk Not Frothing at All: Several factors could be at play:
- Milk Temperature: Is your milk cold enough?
- Steam Pressure: Is your machine producing adequate steam pressure? Smaller home machines can sometimes struggle.
- Technique: Is the steam wand submerged too deep, preventing air incorporation? Or too shallow, just creating large bubbles?
- Milk Type: While rare, some heavily processed milks may have altered protein structures that hinder frothing. Ensure your milk is fresh.
“To create perfect milk foam, the temperature of the milk is key. Always ensure your milk is adequately chilled before you begin, and avoid overheating it during the frothing process.”
Conclusion
The debate between whole milk and skim milk for frothing isn’t about which is inherently “better,” but rather which is “better for what.” Whole milk consistently delivers a rich, velvety microfoam that’s a dream for latte art and those who crave a full-bodied, creamy texture. Skim milk, conversely, excels in producing a voluminous, airy foam, perfect for those who prefer a lighter drink or appreciate the robust flavor of their coffee to shine through. Two percent milk stands as a balanced choice, offering a satisfying middle ground.
Ultimately, your ideal milk choice depends on your personal taste, the type of drink you’re crafting, and your frothing goals. Don’t be afraid to experiment with different dairy and non-dairy options. With a little practice, understanding the science, and applying these expert tips, you’ll be well on your way to mastering the art of milk frothing. What’s your go-to milk for a perfect frothy beverage?
Frequently Asked Questions
Which milk is best for latte art?
Whole milk is generally considered the best for latte art due to its optimal fat and protein ratio, which creates a dense, velvety microfoam that is both stable and pourable. The creaminess allows for intricate designs to hold their shape effectively.
Can I froth cold milk?
No, milk must be heated to froth effectively. The proteins in milk require heat to denature and unfold, allowing them to entrap air bubbles and create a stable foam. You always start with cold milk to give you more time to introduce air before it reaches the optimal temperature.
Why does my skim milk foam disappear quickly?
Skim milk foam often disappears quickly because it lacks the fat content that contributes to foam stability. While skim milk proteins can create voluminous foam, the absence of fat globules means the foam structure is less robust and prone to drying out and separating more rapidly.
What temperature should milk be frothed to?
The ideal temperature for frothing milk is typically between 140°F to 150°F (60°C to 65°C). Within this range, milk proteins are most effective at stabilizing the foam, and the milk’s natural sweetness is enhanced without developing a scalded flavor.
Is non-dairy milk harder to froth?
Some non-dairy milks can be harder to froth than dairy milk due to differences in protein and fat content. However, many brands now offer “barista” versions specifically formulated with stabilizers to improve their frothing performance, often yielding excellent results for lattes and cappuccinos.