Achieving café-quality milk foam at home can often feel like a barista’s secret art. You might have the best coffee beans and a capable milk steamer, yet the velvety, smooth microfoam seen in professional lattes remains elusive, leaving you with thin, bubbly, or collapsed froth. The good news is that perfecting your milk foam isn’t about magic; it’s about understanding and avoiding common pitfalls. This guide will walk you through the most frequent mistakes that ruin your milk foam texture and provide actionable solutions to transform your daily coffee ritual.
Understanding Perfect Milk Foam: Beyond Just Bubbles
At its heart, perfect milk foam, or “microfoam,” is a delicate emulsion of air and milk proteins, far more intricate than simple bubbles. When done correctly, microfoam should possess a glossy, velvety sheen, feeling silky smooth on the tongue, not airy or hollow. It should pour like wet paint, seamlessly integrating with your espresso to create a harmonious blend that enhances both taste and texture. This stability and consistency are what enable stunning latte art and elevate a good coffee into a memorable one. Without proper microfoam, your intricate designs collapse, and the overall mouthfeel of your drink suffers, leaving behind a watery separation rather than a creamy indulgence.
The Foundation: Choosing the Right Milk
One of the first and most critical steps in achieving impeccable milk foam is selecting the right type of milk.
Mistake 1: Using the Wrong Type of Milk
|
Our Picks for the Best Milk steamer in 2026
As an Amazon Associate I earn from qualifying purchases.
|
||
| Num | Product | Action |
|---|---|---|
| 1 | SIMPLETASTE Milk Frother, 4-in-1 Electric Milk Steamer, Automatic Warm and Cold Foam Maker and Milk Warmer for Latte, Cappuccinos, Macchiato |

|
| 2 | SIMPLETASTE Milk Frother, 4-in-1 Electric Milk Steamer, Automatic Warm and Cold Foam Maker and Milk Warmer for Latte, Cappuccinos, Macchiato |
|
| 3 | HAUSHOF Milk Frother, 4-in-1 Electric Milk Frother and Steamer, Large Capacity, Hot Chocolate Maker, Automatic Warm and Cold Foam Maker for Coffee, Latte, Macchiato, Cappuccino |
|
| 4 | Large Electric Milk Frother and Steamer, 16.9oz/500ml Milk Steamer and Frother for Latte or Hot Chocolate, Dishwasher Safe, 6 Functions, Enjoy Perfect Milk Froth in 2 Min (White-Glass) |
|
| 5 | SIMPLETASTE Milk Frother, 4-in-1 Electric Milk Frother and Steamer, Automatic Warm and Cold Foam Maker and Milk Warmer for Latte, Cappuccinos, Dark Blue |
|
| 6 | Milk Frother, 4-in-1 Milk Frother and Steamer, 10.6oz Electric Milk Steamer, Automatic Cold and Hot Foam maker for Lattes, Cappuccinos, Ceramic Lining Interior (Polished) |
|
| 7 | Milk Frother and Steamer, Large Capacity & Detachable Electric Milk Frother, Automatic Warm and Cold Foam Maker, Hot Chocolate Maker, Stainless Steel Jug, 30.44Oz./900ML |
|
| 8 | Milk Frother, Paris Rhône 4-in-1 Milk Steamer and Frother, Hot & Cold Foam Milk Warmer with Temperature Control, Auto Shut-Off Frothers for Coffee, Latte, Cappuccino, Macchiato |
|
| 9 | Milk Frother, 4-in-1 Electric Milk Steamer, 350ml/11.8oz Automatic Frother Machine for Coffee, Warm and Cold Foam, Temperature Control for Latte, Cappuccino, Hot Chocolate |
|
| 10 | Electric Milk Frother and Steamer, 16.9oz/500ml Milk Steamer and Frother for Latte, Dishwasher Safe, BPA Free, 4 Functions, Enjoy Perfect Milk Froth in 2 Min |
|
Many enthusiasts overlook the crucial role milk type plays in frothing success. The fat and protein content of milk directly influences its ability to create and sustain foam. Using milk with insufficient fat, or non-dairy alternatives not specifically formulated for frothing, can lead to thin, unstable foam that quickly dissipates. Whole milk is typically favored by baristas for its higher fat content, which contributes to a richer, creamier texture and more stable foam. For those preferring non-dairy options, “barista blends” of almond, oat, or soy milk are engineered with added proteins and stabilizers to mimic the frothing characteristics of dairy milk, making them ideal choices for achieving comparable results.
The Heat Factor: Temperature Control is Key
Temperature control is a non-negotiable aspect of milk frothing that significantly impacts the final texture and taste.
Mistake 2: Overheating or Underheating the Milk
The milk’s temperature during frothing is paramount. Underheating the milk results in a weak, unstable foam that collapses almost immediately. Conversely, overheating—typically beyond 65-70°C (150-170°F)—causes the milk proteins to break down. This denaturation leads to a flat, dull, or even burnt taste, destroying the natural sweetness of the milk and compromising the velvety texture you’re striving for. The sweet spot for frothing dairy milk is generally between 55-65°C (130-150°F), where the milk’s natural sugars are caramelized, and its proteins are optimally textured. For alternative milks, it’s often recommended to aim for a slightly lower temperature, around 53-55°C (125-130°F), as some, like almond milk, can turn bitter if heated too high. Using a thermometer, or developing a keen sense of touch by holding the pitcher, is invaluable for consistent results.
 A barista checking milk temperature with a thermometer to avoid common frothing mistakes
Mastering the Technique: Steam Wand Placement and Aeration
Even with the correct milk and temperature, improper technique can still derail your efforts. The way you handle your steam wand is fundamental.
Mistake 3: Incorrect Steam Wand Placement
The placement of your steam wand is critical to incorporating air correctly and creating fine microfoam. If the wand tip is positioned too high in the pitcher, it will violently inject too much air, creating large, airy bubbles and an unpleasant, loud “screaming” sound. This results in an overly frothy, unstable foam that separates quickly. Conversely, placing the steam wand too low prevents sufficient air from being injected into the milk, leading to a thin, watery texture that lacks body and creaminess, making it unsuitable for latte art. The ideal starting position for the steam wand tip is just beneath the surface of the milk, allowing for controlled air introduction.
Mistake 4: Improper Aeration Timing or Duration
Timing your aeration—the process of introducing air into the milk—is often misunderstood. Many beginners make the mistake of aerating for too long or too short a period, or worse, aerating only when the milk is already warm. Aerating when the milk is too warm leads to large, separated bubbles that resemble seafoam rather than silky microfoam. For the best microfoam, aeration should primarily occur when the milk is still cold, typically before it reaches 38°C (100°F). After the initial aeration phase, the wand should be submerged slightly deeper to heat the milk to its final temperature and integrate the foam. Frothing for too long can break down the delicate foam structure, while frothing for too short a time won’t create enough volume or texture. For manual frothers, aiming for about 20-30 seconds of active frothing is a good starting point, but always refer to your specific frother’s instructions for automatic models.
Mistake 5: Neglecting the “Roll” or Vortex
Once air has been introduced, the next critical step is to integrate it seamlessly into the milk, often referred to as creating a “roll” or vortex. Failing to do this after the initial aeration phase will leave you with large, inconsistent bubbles floating on top of warm milk. The vortex motion, created by slightly tilting the pitcher and submerging the steam wand tip, helps to fold the air into the milk, breaking down any large bubbles and creating a homogeneous, silky texture. This crucial step ensures that the microfoam is evenly distributed throughout the milk, making it smooth and pourable, ideal for latte art and a superior drinking experience. Before pouring, a quick tap of the pitcher on the counter and a gentle swirl further refine the texture, eliminating any remaining larger bubbles.
“To achieve perfect milk foam, temperature control and proper technique are paramount. Always start with cold milk and maintain the right steam wand position to create that desirable velvety texture.”
Overlooked Essentials: Cleanliness and Freshness
Beyond technique, two fundamental habits often overlooked can significantly impact your milk foam quality.
Mistake 6: Using Dirty Equipment
A commonly ignored mistake is failing to maintain clean equipment. A steam wand that hasn’t been purged before use can inject residual water into your milk, diluting it and negatively affecting the foam’s texture. Similarly, leftover milk residue in a frother can quickly build up, not only affecting the taste of subsequent batches by imparting off-flavors but also potentially clogging nozzles and reducing the frother’s efficiency. Dried milk can be particularly difficult to remove and provides a breeding ground for bacteria. Developing a strict habit of purging your steam wand before and after each use and immediately rinsing or cleaning your frother thoroughly after every session is essential for both hygiene and consistent foam quality.
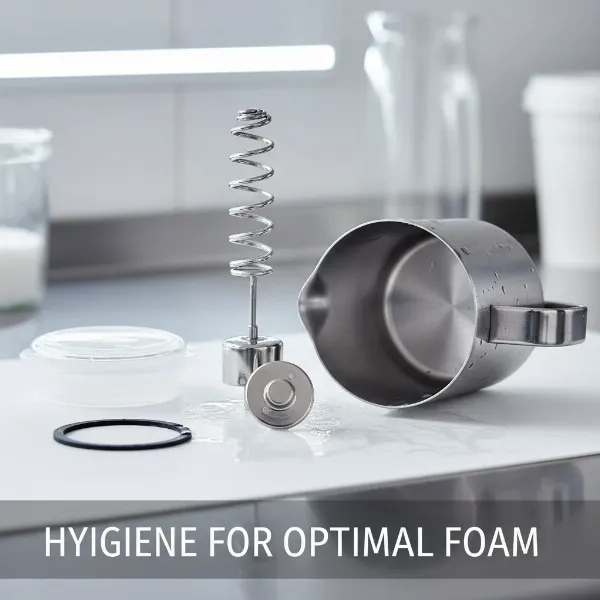 Close-up of clean milk frother components, emphasizing hygiene for perfect foam
Mistake 7: Reusing Steamed Milk
Many people wonder if they can simply reheat or re-froth leftover steamed milk for another drink. The unequivocal answer is no. Once milk has been steamed, its proteins undergo a structural change (denaturation) that prevents them from holding air and forming a stable foam again. Attempting to re-froth already steamed milk will only result in a flat, lifeless liquid that lacks any desirable texture or sweetness. For the best possible microfoam, always start with fresh, cold milk straight from the refrigerator for every single batch you froth. This ensures optimal protein structure and gas solubility, which are vital for achieving that perfect, silky texture.
Expert Tips for Consistently Perfect Foam
- Start with Ice-Cold Milk: Colder milk gives you more time to incorporate air before it heats up, allowing for finer microfoam development.
- Utilize a Thermometer: Especially when starting out, a thermometer is your best friend for hitting that ideal temperature range every time.
- Practice with Water and Dish Soap: To refine your technique without wasting precious milk, practice with a pitcher of water mixed with a drop of dishwashing liquid. It foams similarly to milk, allowing you to build muscle memory.
- Understand Your Equipment: Every milk steamer or frother has its quirks. Take time to learn how yours behaves and adjust your technique accordingly.
- Swirl and Tap: After steaming, always give the pitcher a firm tap on the counter to break any large bubbles, then swirl the milk vigorously to integrate the foam before pouring.
Conclusion
The journey to perfect milk foam texture is one of refinement and practice, where seemingly small details make all the difference. By diligently avoiding common mistakes such as using the wrong milk, neglecting temperature control, fumbling with steam wand placement, or overlooking basic cleanliness, you can consistently achieve the silky, velvety microfoam that transforms everyday coffee into an extraordinary experience. Remember that every skilled barista started somewhere, and consistency comes with repetition and attention to these fundamental principles. Experiment, be patient with yourself, and enjoy the rich, creamy rewards of your improved milk steaming technique. What’s your favorite milk-based drink to perfect at home?
Frequently Asked Questions
What is the ideal temperature for milk frothing?
The ideal temperature range for frothing dairy milk is typically between 55-65°C (130-150°F). This range allows the milk’s natural sugars to sweeten and proteins to structure into a stable microfoam, avoiding a burnt or flat taste. For non-dairy milks, a slightly lower temperature of 53-55°C (125-130°F) is often preferred to prevent bitterness.
Can I froth skim milk for latte art?
While skim milk can technically be frothed, its low-fat content makes it more challenging to create the rich, stable microfoam necessary for detailed latte art. The foam produced tends to be lighter and less durable. For best results, whole milk or a non-dairy barista blend with higher fat and protein content is recommended for latte art.
Why does my milk foam have large bubbles?
Large bubbles in your milk foam are often a sign that the steam wand was positioned too high or introduced too much air too quickly during the initial aeration phase. To fix this, ensure the wand tip is just beneath the surface to gently incorporate air, and then submerge it deeper to create a rolling motion that integrates the air and breaks down larger bubbles.
How often should I clean my milk frother?
It is crucial to clean your milk frother and purge your steam wand immediately after every single use. This prevents milk residue from drying and building up, which can harbor bacteria, affect taste, and compromise the performance and longevity of your equipment. A quick rinse or wipe down is usually sufficient for routine cleaning.
What’s the best milk alternative for frothing?
For consistent and high-quality milk foam, “barista blend” versions of non-dairy milks are generally the best alternatives. Oat milk and almond milk barista blends are particularly popular due to their protein and fat content being optimized for frothing, producing a creamy, stable microfoam that closely resembles dairy milk.