There’s nothing quite like a perfectly frothed milk for your morning latte or cappuccino, but the joy can quickly turn into frustration when you discover burnt milk residue stubbornly clinging to your milk steamer jug. This common annoyance can impact the taste of your beloved beverages and even shorten the lifespan of your equipment. Fortunately, rescuing your milk steamer jug from burnt-on milk doesn’t have to be a daunting task. With the right approach and a few household staples, you can quickly restore your jug to its sparkling clean condition, ensuring every coffee creation is as delicious as the last.
The Sticky Situation: Why Burnt Milk Clings and Why It Matters
Burnt milk residue is a familiar foe for any home barista or coffee shop professional. It forms when milk is overheated or left in contact with a hot surface for too long, causing the milk proteins and sugars to caramelize and bond tenaciously to the jug’s interior. This isn’t just an aesthetic issue; burnt milk can impart an unpleasant, scorched flavor to your fresh milk, ruining the taste of your coffee. Moreover, neglected residue can harbor bacteria, creating hygiene concerns, and even corrode or damage the surface of your milk steamer jug over time, especially if it’s a non-stick model. Addressing burnt milk promptly is crucial for both taste quality and equipment longevity.
Your Cleaning Toolkit: Essential Supplies for Tackling Burnt Milk
Before diving into the cleaning process, gather your arsenal of tools and ingredients. Most solutions for burnt milk can be found right in your kitchen cabinet. You’ll primarily need:
- Hot water: Essential for soaking and loosening residue.
- Dish soap: A gentle degreaser for initial cleaning.
- White vinegar: An acidic powerhouse for dissolving stubborn milk proteins.
- Baking soda: A mild abrasive and deodorizer, effective in paste or solution form.
- Lemon juice: A natural, pleasant-smelling alternative to vinegar, with similar acidic properties.
- Soft scrubbing brush or sponge: To gently dislodge softened residue without scratching.
- Microfiber cloths: Ideal for wiping and polishing.
- Dedicated milk frother cleaning tablets/powder (optional): For deep cleaning or very stubborn buildup.
- Wooden or plastic scraper: If a gentle scrape is needed, to protect the jug’s surface.
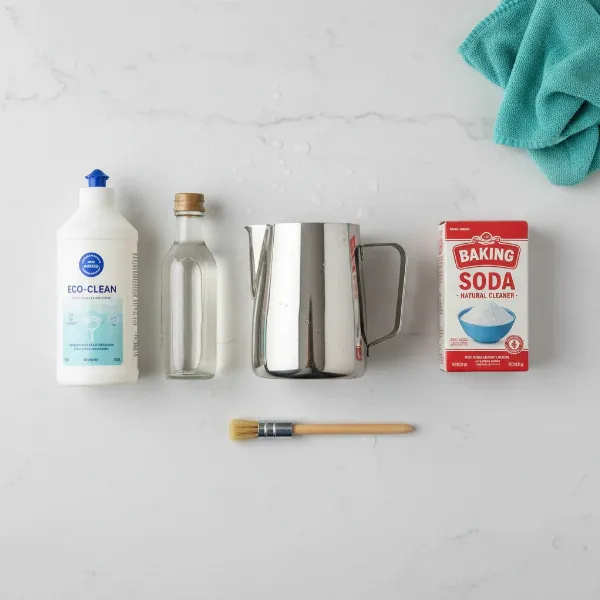 A collection of milk steamer jug cleaning tools: a stainless steel jug, dish soap, white vinegar, baking soda, a soft brush, and a microfiber cloth.
Step-by-Step Solutions: How to Quickly Clean Burnt Milk from Your Milk Steamer Jug
Tackling burnt milk requires patience and the right technique. Start with the gentlest method first and escalate if the residue persists.
Method 1: The Warm Soak & Gentle Scrub (For Light Residue)
This method is your first line of defense against freshly burnt or lightly stuck-on milk. Its effectiveness lies in allowing the warm water to soften the residue.
- Steps:
- Immediately after use, if possible, rinse out any loose milk.
- Fill the milk steamer jug with hot tap water and add a few drops of dish soap.
- For a built-in steam wand, submerge the wand completely in a separate vessel filled with hot soapy water.
- Let it soak for 10-15 minutes. The heat and soap will begin to break down the milk proteins.
- After soaking, use a soft scrubbing brush or sponge to gently wipe away the loosened burnt milk. For steam wands, a thin brush or pipe cleaner can reach inside.
- Rinse thoroughly with clean water and dry with a microfiber cloth.
|
Our Picks for the Best Milk steamer in 2026
As an Amazon Associate I earn from qualifying purchases.
|
||
| Num | Product | Action |
|---|---|---|
| 1 | SIMPLETASTE Milk Frother, 4-in-1 Electric Milk Steamer, Automatic Warm and Cold Foam Maker and Milk Warmer for Latte, Cappuccinos, Macchiato |

|
| 2 | HAUSHOF Milk Frother, 4-in-1 Electric Milk Frother and Steamer, Large Capacity, Hot Chocolate Maker, Automatic Warm and Cold Foam Maker for Coffee, Latte, Macchiato, Cappuccino |
|
| 3 | Milk Frother, Paris Rhône 4-in-1 Milk Steamer and Frother, Hot & Cold Foam Milk Warmer with Temperature Control, Auto Shut-Off Frothers for Coffee, Latte, Cappuccino, Macchiato |
|
| 4 | Milk Frother, 4-in-1 Electric Milk Steamer, 350ml/11.8oz Automatic Frother Machine for Coffee, Warm and Cold Foam, Temperature Control for Latte, Cappuccino, Hot Chocolate |
|
| 5 | Electric Milk Frother and Steamer, 16.9oz/500ml Milk Steamer and Frother for Latte, Dishwasher Safe, BPA Free, 4 Functions, Enjoy Perfect Milk Froth in 2 Min |
|
| 6 | SIMPLETASTE Milk Frother, 4-in-1 Electric Milk Steamer, Automatic Warm and Cold Foam Maker and Milk Warmer for Latte, Cappuccinos, Macchiato |
|
| 7 | Milk Frother, 4-in-1 Milk Frother and Steamer, 10.6oz Electric Milk Steamer, Automatic Cold and Hot Foam maker for Lattes, Cappuccinos, Ceramic Lining Interior (Polished) |
|
| 8 | Large Electric Milk Frother and Steamer, 16.9oz/500ml Milk Steamer and Frother for Latte or Hot Chocolate, Dishwasher Safe, 6 Functions, Enjoy Perfect Milk Froth in 2 Min (White-Glass) |
|
| 9 | SIMPLETASTE Milk Frother, 4-in-1 Electric Milk Frother and Steamer, Automatic Warm and Cold Foam Maker and Milk Warmer for Latte, Cappuccinos, Dark Blue |
|
| 10 | Milk Frother and Steamer, Large Capacity & Detachable Electric Milk Frother, Automatic Warm and Cold Foam Maker, Hot Chocolate Maker, Stainless Steel Jug, 30.44Oz./900ML |
|
This simple soak-and-wipe method is often enough for everyday spills and light burns, preventing residue from hardening further.
Method 2: Harnessing Acidic Power with Vinegar or Lemon Juice (For Stubborn Stains)
When warm water and soap aren’t enough, it’s time to bring in the acids. White vinegar and lemon juice are excellent for dissolving tough, burnt-on milk proteins.
- Steps (Vinegar):
- Empty any remaining milk.
- Pour a solution of equal parts white vinegar and warm water into the jug, ensuring it covers the burnt areas. For wands, submerge the tip in a small cup of this solution.
- Let it soak for 15-20 minutes, or longer for very stubborn stains (up to an hour). The acetic acid in vinegar works to break down the milk proteins.
- After soaking, gently scrub with a non-abrasive sponge or brush. You’ll notice the residue becoming easier to remove.
- Rinse the jug thoroughly with clean water multiple times to remove all traces of vinegar and its scent.
- Steps (Lemon Juice):
- Mix fresh lemon juice with an equal amount of warm water.
- Follow the same soaking and scrubbing steps as with white vinegar. Lemon’s citric acid provides a similar cleaning action and leaves a fresher scent.
Method 3: Baking Soda’s Abrasive & Foaming Action (For Tough Buildup)
Baking soda is a versatile cleaner, offering both a mild abrasive quality and a reaction with hot water that can lift stubborn stains.
- Steps (Baking Soda Paste):
- Make a thick paste by mixing baking soda with a small amount of water.
- Apply the paste directly to the burnt milk areas inside the jug.
- Let it sit for 10-15 minutes, allowing the baking soda to work on the residue.
- Gently scrub with a soft brush or sponge.
- Rinse well.
- Steps (Baking Soda & Boiling Water Soak):
- Sprinkle about a quarter cup of baking soda into the burnt jug.
- Carefully pour boiling water into the jug, a little at a time, to create a foaming reaction.
- Fill the jug completely and let it soak for several hours or overnight.
- The foaming action helps to lift the burnt milk.
- After soaking, the residue should be significantly softened and easier to scrub away. Rinse thoroughly.
Method 4: Professional Cleaning Tablets (For Deep Cleaning & Neglected Cases)
For commercial-grade espresso machines or severely neglected home equipment, specialized milk frother cleaning tablets or powders are highly effective. Brands like Urnex Cafiza or Rinza are formulated to break down milk fats and proteins.
- Steps:
- Follow the product instructions carefully, as concentrations can vary.
- Typically, you’ll dissolve one tablet or a scoop of powder in hot water in your milk jug.
- Submerge the steam wand (if detachable) or immerse the jug itself in the solution, ensuring all affected areas are covered.
- For attached steam wands, you might be instructed to “steam” the cleaning solution for a few seconds to clean internal parts, then let it soak.
- Allow to soak for the recommended time (often 15-30 minutes).
- After soaking, thoroughly rinse the jug and purge the steam wand repeatedly with fresh water to remove any chemical residue.
Prevention is Better Than Cure: Keeping Your Milk Steamer Jug Spotless
The easiest way to deal with burnt milk is to prevent it from happening in the first place. Incorporating a few simple habits into your daily routine can keep your milk steamer jug pristine.
Immediate Action After Use
- Wipe Immediately: As soon as you finish steaming milk, wipe the steam wand and the inside of the jug with a clean, damp microfiber cloth. Milk residue is easiest to remove when still warm and wet.
- Purge the Steam Wand: For espresso machine steam wands, always purge steam for 2-3 seconds before and after each use. This clears out any milk trapped inside the wand, preventing blockages and sour smells.
Best Practices for Steaming Milk
- Start with Cold Milk: Cold milk allows for a longer steaming time before reaching optimal temperature, giving you more control and reducing the risk of burning.
- Don’t Overheat: Aim for milk temperatures between 140-155°F (60-68°C) for the best texture and taste. Overheating not only scorches the milk but also makes it more likely to burn onto the jug.
- Rinse Between Uses: If you’re making multiple milk-based drinks, give your jug a quick rinse with water between each use to prevent residue buildup.
Regular Maintenance Schedule
- Daily Rinse & Wash: After your last coffee of the day, give your milk steamer jug a thorough wash with hot soapy water.
- Weekly Deep Clean: Perform a more intensive clean using one of the acidic or baking soda methods once a week, even if you don’t see visible burnt milk. This prevents hidden buildup.
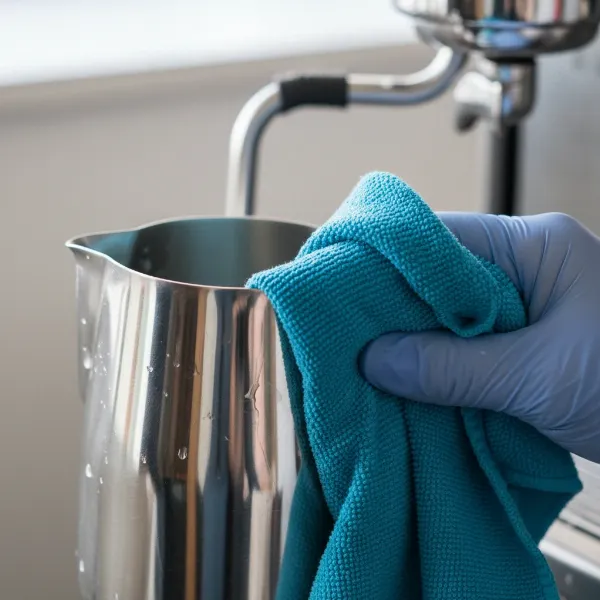 A hand wiping down a clean stainless steel milk steamer jug after use, emphasizing prevention.
Avoid These Common Cleaning Mistakes
While aiming for a spotless jug, it’s easy to fall into traps that can cause more harm than good.
- Using Abrasive Materials: Avoid steel wool, harsh scouring pads, or metal utensils on your milk steamer jug. These can scratch stainless steel surfaces and ruin non-stick coatings, making future burnt milk even harder to remove and creating areas where bacteria can thrive.
- Delaying the Clean: The longer burnt milk sits, the harder it becomes to remove. Cleaning immediately or at least soaking shortly after use is critical.
- Leaving Jugs Soaking Indefinitely: While soaking is a good first step, leaving a jug filled with water or cleaning solutions for days can lead to water marks and potential bacterial growth, especially if the water isn’t changed.
- Ignoring the Steam Wand’s Interior: Burnt milk isn’t just visible. Residue can build up inside the steam wand, affecting steam quality and taste. Always purge and consider a dedicated wand brush for deep cleaning.
Conclusion
Burnt milk in your milk steamer jug is an inconvenient but entirely solvable problem. By understanding the most effective cleaning techniques—from simple hot water soaks and the power of natural acids like vinegar and lemon juice to the gentle abrasion of baking soda or specialized cleaning agents—you can quickly restore your equipment. More importantly, adopting a routine of immediate wiping, regular purging, and sensible steaming practices will largely prevent burnt milk from becoming a recurring issue. A clean milk steamer jug not only ensures the longevity of your valuable equipment but, most importantly, guarantees that every frothy, creamy coffee you create tastes exactly as it should: perfect.
What’s your go-to trick for keeping your milk steamer jug impeccably clean?
Frequently Asked Questions
What can I use instead of vinegar to clean burnt milk?
If you prefer not to use vinegar, lemon juice mixed with warm water is an excellent acidic alternative. Baking soda, either as a paste or combined with boiling water, also effectively breaks down burnt milk residue. For more robust cleaning, specialized milk frother cleaning tablets are a strong option.
Can burnt milk damage my milk steamer jug?
Yes, if left unaddressed, burnt milk can lead to several problems. It can corrode stainless steel surfaces over time, particularly if the residue is acidic, and can damage non-stick coatings, making the jug more prone to future sticking and harder to clean. It also harbors bacteria, posing hygiene risks.
How often should I clean my milk steamer jug?
Ideally, you should rinse and wipe your milk steamer jug and steam wand immediately after every single use to prevent milk from drying and hardening. A thorough wash with dish soap should be done daily, and a deeper clean using an acidic solution or specialized cleaner is recommended weekly to address any hidden buildup.
What if the burnt milk smell won’t go away?
A persistent burnt milk smell often indicates that residue remains, possibly in hard-to-reach areas like inside the steam wand or porous plastic parts. Try a longer soak with a stronger solution like white vinegar or a dedicated espresso machine cleaner. Ensure you meticulously scrub all surfaces and purge the wand thoroughly.
Is it okay to use metal scrubbers on stainless steel?
No, it is generally not recommended to use metal scrubbers or steel wool on stainless steel milk steamer jugs. While stainless steel is durable, abrasive materials can create tiny scratches on the surface. These scratches not only dull the finish but can also create microscopic crevices where milk residue can hide and bacteria can grow, making the jug harder to clean in the future.