There’s nothing quite like the silky, rich foam a milk frother creates, transforming an ordinary cup of coffee into a café-quality delight. But when your trusty frother suddenly stops spinning, it can throw a wrench into your morning ritual and leave you wondering if your beloved appliance has seen its last foam. Before you rush to replace it, understand that many non-spinning frother issues can be diagnosed and fixed with a bit of troubleshooting and care. Often, the solution is simpler than you think, saving you time, money, and the disappointment of a flat latte.
Understanding Your Milk Frother: Why It Might Stop Spinning
Milk frothers, whether handheld wands or automatic pitchers, rely on a whisking mechanism to aerate milk and create that desirable foam. Automatic frothers typically use a magnetic drive that spins a detachable whisk, often coupled with a heating element. When this spinning action ceases, it’s usually due to a handful of common culprits, ranging from basic user oversight to minor mechanical or electrical snags. Understanding these underlying reasons is the first step toward bringing your frother back to life.
A frother might stop spinning due to a lack of power, obstructions from residue, a damaged whisk, or even issues with the milk itself. Less commonly, internal electrical components like the motor or heating elements could be at fault, particularly in automatic models. Identifying the correct cause is crucial for applying the right fix and restoring its frothing capabilities.
Initial Troubleshooting: Simple Checks to Get Your Frother Spinning Again
|
Our Picks for the Best Milk steamer in 2026
As an Amazon Associate I earn from qualifying purchases.
|
||
| Num | Product | Action |
|---|---|---|
| 1 | Milk Frother, 4-in-1 Electric Milk Steamer, 350ml/11.8oz Automatic Frother Machine for Coffee, Warm and Cold Foam, Temperature Control for Latte, Cappuccino, Hot Chocolate |

|
| 2 | Milk Frother and Steamer, Large Capacity & Detachable Electric Milk Frother, Automatic Warm and Cold Foam Maker, Hot Chocolate Maker, Stainless Steel Jug, 30.44Oz./900ML |
|
| 3 | Electric Milk Frother and Steamer, 16.9oz/500ml Milk Steamer and Frother for Latte, Dishwasher Safe, BPA Free, 4 Functions, Enjoy Perfect Milk Froth in 2 Min |
|
| 4 | SIMPLETASTE Milk Frother, 4-in-1 Electric Milk Steamer, Automatic Warm and Cold Foam Maker and Milk Warmer for Latte, Cappuccinos, Macchiato |
|
| 5 | SIMPLETASTE Milk Frother, 4-in-1 Electric Milk Steamer, Automatic Warm and Cold Foam Maker and Milk Warmer for Latte, Cappuccinos, Macchiato |
|
| 6 | HAUSHOF Milk Frother, 4-in-1 Electric Milk Frother and Steamer, Large Capacity, Hot Chocolate Maker, Automatic Warm and Cold Foam Maker for Coffee, Latte, Macchiato, Cappuccino |
|
| 7 | Milk Frother, Paris Rhône 4-in-1 Milk Steamer and Frother, Hot & Cold Foam Milk Warmer with Temperature Control, Auto Shut-Off Frothers for Coffee, Latte, Cappuccino, Macchiato |
|
| 8 | Milk Frother, 4-in-1 Milk Frother and Steamer, 10.6oz Electric Milk Steamer, Automatic Cold and Hot Foam maker for Lattes, Cappuccinos, Ceramic Lining Interior (Polished) |
|
| 9 | SIMPLETASTE Milk Frother, 4-in-1 Electric Milk Frother and Steamer, Automatic Warm and Cold Foam Maker and Milk Warmer for Latte, Cappuccinos, Dark Blue |
|
| 10 | Large Electric Milk Frother and Steamer, 16.9oz/500ml Milk Steamer and Frother for Latte or Hot Chocolate, Dishwasher Safe, 6 Functions, Enjoy Perfect Milk Froth in 2 Min (White-Glass) |
|
Before delving into more complex repairs, it’s wise to start with the most straightforward troubleshooting steps. Many spinning issues are resolved by addressing power, cleanliness, or proper usage. These initial checks are quick, require no special tools, and can often uncover the root of the problem without needing to disassemble your appliance.
Power and Connection Checks
Is your frother receiving power? It might seem obvious, but a loose plug or a tripped circuit breaker is a surprisingly common reason for a non-responsive appliance. Ensure the frother is securely plugged into a functioning electrical outlet. If it’s an automatic model with a base, verify that the frother jug is correctly seated on its power base. Sometimes, using multiple high-wattage appliances on the same circuit can overload it, causing the breaker to trip. Check your home’s circuit breaker box and reset any tripped switches.
Whisk Inspection and Cleaning
The whisk is the heart of your frother’s spinning action. If it’s not spinning, a dirty or damaged whisk is often the primary suspect. Remove the whisk from the frother and inspect it closely for any milk residue, dried-on bits, or foreign objects that might be hindering its movement. For handheld frothers, check the spinning head for similar obstructions.
Clean the whisk thoroughly using warm soapy water, and for stubborn buildup, consider soaking it in a solution of half white vinegar and half water for a few hours or even overnight. Use a soft-bristle brush or an old toothbrush to gently scrub away any remaining gunk, then rinse it well with cold water and dry it completely. Ensure the whisk is reinserted correctly and securely into its designated spot. A worn or bent whisk might also fail to spin efficiently, in which case replacement would be necessary.
Frother Interior Cleaning
Beyond the whisk itself, the interior of your frother, especially the area where the whisk attaches and spins, can accumulate stubborn residue. This buildup, particularly in automatic frothers that use magnetic induction, can create friction or block the magnetic field, preventing the whisk from spinning freely. Even a thin layer of dried milk can be enough to interfere with the delicate mechanics.
To clean the interior effectively, first unplug the device and remove the whisk. Fill the frother with a solution of equal parts white vinegar and water. Let it sit for a few hours or overnight to loosen any hardened milk deposits. After soaking, pour out the solution, rinse the interior with cold water, and gently scrub with a non-abrasive sponge or brush. Always dry the frother thoroughly before its next use, as moisture can interfere with electrical components. Regular rinsing with cold water after each use and a deeper clean weekly can prevent future issues.
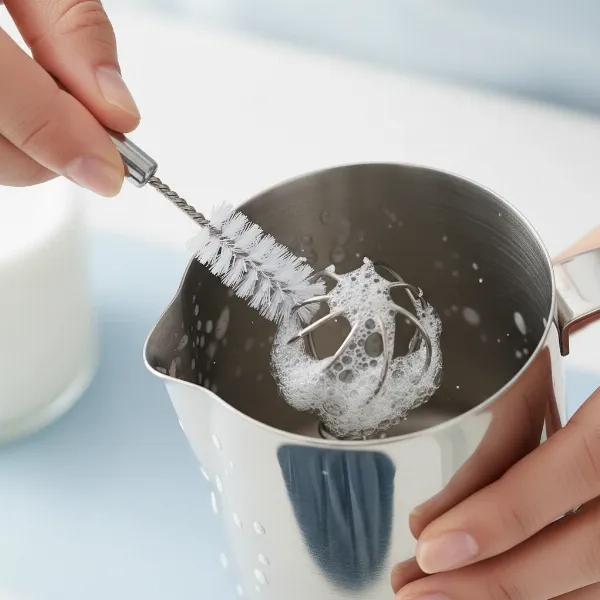 Close-up of a hand cleaning a milk frother whisk and interior with a brush, emphasizing thorough residue removal
Milk Type and Temperature
Believe it or not, the type and temperature of milk you use can impact your frother’s performance. For optimal frothing, most manufacturers recommend using fresh, cold cow’s milk, specifically whole milk or 2%. These types of milk have the ideal fat and protein content to create stable, voluminous foam. Alternative milks, such as almond or oat milk, may not froth as effectively unless specifically formulated for baristas, due to their differing protein and fat structures.
Always ensure your milk is cold, straight from the refrigerator, as cold milk froths better and more consistently. Some experts even suggest shaking the milk carton before pouring it into the frother to help distribute fats and proteins evenly, potentially leading to better foam. Using milk that is too warm or has been opened for too long can result in a lack of spin or poor frothing quality.
Overheating
Frequent, back-to-back use can cause your milk frother to overheat, especially smaller household models. Many frothers are equipped with thermal protection that will automatically shut off the device if it reaches an unsafe temperature to prevent damage. If your frother stops spinning mid-cycle or refuses to start after recent use, it might simply need time to cool down.
Allow your frother to rest for 10-15 minutes between uses to let the internal components cool. Rinsing the frother jug with cold water immediately after use can also help dissipate residual heat more quickly. A flashing red light on some models often indicates an overheating issue, signaling that the device needs a break before it can perform optimally again. Patience is key here, as forcing a frother to work while hot can lead to permanent damage.
When to Dig Deeper: Advanced Troubleshooting Steps
If the simpler fixes haven’t resolved your frother’s spinning problem, it’s time to investigate slightly more advanced potential issues. These steps might require a bit more attention to detail, but they are still within the realm of most DIY enthusiasts. Always ensure the device is unplugged before performing any inspections that involve internal components or electrical contacts.
Examining Electrical Contacts
Automatic milk frothers typically have metal electrical contacts on the bottom of the frother canister and on the base station. These contacts facilitate power transfer to the heating element and motor. Over time, these connectors can accumulate milk residue, grease, or grime, particularly if there have been instances of milk overflow. This buildup can impede electrical conductivity, preventing the frother from working correctly, including the spinning mechanism.
With the frother unplugged, turn the frothing canister upside down and visually inspect the metal contacts. Do the same for the contacts on the base station. If you notice any discoloration or sticky residue, clean them thoroughly. Use a small brush and a mild soap-and-water solution to scrub away the gunk. For a more robust clean, follow up with isopropyl alcohol or a dedicated contact cleaner spray, ensuring all residue is removed and the contacts are shiny. Dry them completely before attempting to use the frother again.
Replacing the Whisk
While cleaning can solve many whisk-related problems, sometimes the whisk itself is beyond repair. If your frother’s whisk appears bent, broken, severely worn, or if its magnetic coupling (for automatic frothers) feels weak, it might be time for a replacement. A damaged whisk won’t engage properly with the motor or magnetic drive, leading to a lack of spin or poor frothing performance.
Replacement whisks are often available from the frother manufacturer or through third-party retailers online. Before purchasing, verify that you are getting the correct whisk model for your specific frother. Replacing it is usually as simple as removing the old one and snapping the new one into place. This quick fix can significantly improve frothing if the whisk was the primary issue.
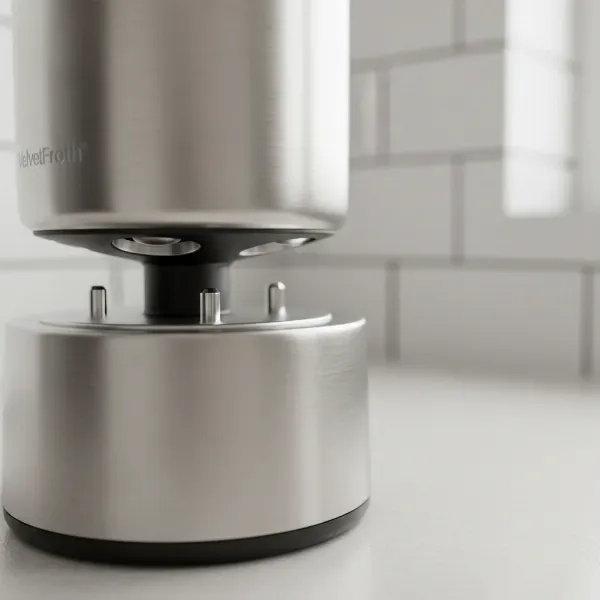 Close-up of a milk frother's base station and the bottom of the jug, highlighting clean electrical contacts
Common Frother Issues and Their Quick Fixes
| Issue | Potential Cause | Quick Fix |
|---|---|---|
| Whisk not spinning | Dirty whisk/interior, improper milk, power issue, worn whisk | Clean whisk and interior, use cold cow’s milk, check power connections, replace worn whisk |
| Frother not turning on | No power, faulty switch, dirty electrical contacts | Check plug/outlet/breaker, clean contacts, ensure switch is on |
| Weak or no froth (but heats) | Incorrect milk type/temperature, dirty components, worn whisk | Use cold whole/2% milk, clean whisk/interior, replace damaged whisk |
| Frother stops mid-cycle | Overheating, low power, internal thermal fuse | Allow frother to cool, check power, consider professional repair for internal fuse issues |
| Frother heats milk but no spin | Obstructed whisk, magnetic drive issue, motor fault | Clean whisk/interior thoroughly, ensure whisk is correctly seated, seek professional repair for motor |
Choosing Your Path: Repair vs. Replace
You’ve tried the troubleshooting steps, but your milk frother still refuses to spin. Now you face a decision: continue trying to repair it or invest in a new one. This choice often boils down to several factors, including the cost of potential repairs, the age of your frother, and its initial purchase price. For minor issues like a dirty whisk or contacts, DIY repair is often successful and cost-effective.
However, if the problem points to an internal electrical component, such as the motor, heating element, or a thermal fuse, the repair becomes more complex. These advanced repairs often require opening the appliance, using specialized tools like a multimeter, and possibly soldering. Such tasks carry risks of further damage or even electrical shock if not performed by someone with expertise.
“To truly fix complex frother issues involving internal electronics, professional assistance is invaluable. Attempting advanced repairs without adequate knowledge can often do more harm than good, and safety should always be your top priority.”
Consider the age of your frother. If it’s an older model that has seen years of use, the cost of parts and labor for a professional repair might approach or even exceed the price of a brand-new unit. Many newer frothers offer improved features, better durability, and energy efficiency, making replacement a more appealing option in the long run. If your frother is still under warranty, contact the manufacturer; they might offer repair services or a replacement.
Maintenance Tips to Prevent Future Spinning Issues
Proactive maintenance is the best defense against your milk frother developing spinning problems. Incorporating a few simple habits into your routine can significantly extend the life of your appliance and ensure it consistently delivers perfectly frothed milk. Regular care not only keeps the mechanical parts functioning smoothly but also preserves the hygiene and efficiency of your frother.
Always rinse your frother’s whisk and interior with cold water immediately after each use. This prevents milk residue from drying and hardening, which is a major cause of obstructions. For automatic models, a weekly deep clean with a vinegar solution will tackle any buildup that daily rinsing might miss. Ensure you use cold, fresh milk, and avoid overfilling the frother past the maximum fill line, as this can lead to spills that gum up the electrical contacts. Finally, always allow your frother to cool down completely between uses to prevent overheating, which can prematurely wear out internal components. These simple steps ensure your frother remains a reliable companion in your coffee journey.
Conclusion
A milk frother that won’t spin can be a frustrating experience, but it’s often a solvable problem. By systematically checking for power issues, thoroughly cleaning the whisk and interior, ensuring proper milk usage, and allowing the device to cool, you can resolve many common faults. While more advanced electrical issues may require professional attention or signal that it’s time for a replacement, don’t underestimate the power of basic troubleshooting and diligent maintenance. A little care goes a long way in ensuring your appliance continues to create delightful foam for your favorite beverages. With these tips, you’re well-equipped to tackle most spinning woes. What’s your secret to maintaining a perfectly frothy morning routine?
Frequently Asked Questions
What type of milk is best for frothing?
Whole or 2% cow’s milk, used cold and fresh from the refrigerator, typically froths best due to its optimal protein and fat content. While some plant-based milks are formulated for frothing, dairy usually provides the most consistent and stable foam.
How do I properly clean my milk frother to prevent issues?
After each use, rinse the whisk and frother interior with cold water. For a deeper clean, soak detachable parts in a solution of equal parts white vinegar and water for several hours, then scrub with a non-abrasive brush and rinse thoroughly.
Why does my frother heat the milk but not create foam?
This often indicates an obstruction preventing the whisk from spinning effectively or an issue with the milk itself. Thoroughly clean the whisk and the frother’s interior, and ensure you are using cold, fresh milk that is suitable for frothing.
What are common signs of a malfunctioning milk frother beyond not spinning?
Other signs include inconsistent foam quality, strange noises during operation, failure to heat milk, or the frother turning off prematurely. These symptoms can point to issues with the whisk, motor, heating element, or thermal sensors.
Is it always worth repairing a frother that won’t spin?
Not always. For simple fixes like cleaning or whisk replacement, yes. However, if the issue involves complex internal electrical components or the frother is old and out of warranty, purchasing a new unit may be more cost-effective and safer than attempting advanced repairs.